1. Introduction
Setting up data infra is one of the most complex parts of starting a data engineering project. If you are overwhelmed by
Setting up data infrastructure such as Airflow, Redshift, Snowflake, etc
Trying to setup your infrastructure with code
Not knowing how to deploy new features/columns to an existing data pipeline
Dev ops practices such as CI/CD for data pipelines
Then this post is for you. This post will cover the critical concepts of setting up data infrastructure, development workflow, and a few sample data projects that follow this pattern. We will also use a data project template that runs Airflow, Postgres, & Metabase to demonstrate how each concept works.
By the end of this post, you will be able to understand how to set up data infrastructure with code, how developers work together on new features to data pipeline, & have a GitHub template that you can use for your data projects.
2. Run Data Pipeline
Code available at data_engineering_project_template repository.
2.1. Run on codespaces
You can run this data pipeline using GitHub codespaces. Follow the instructions below.
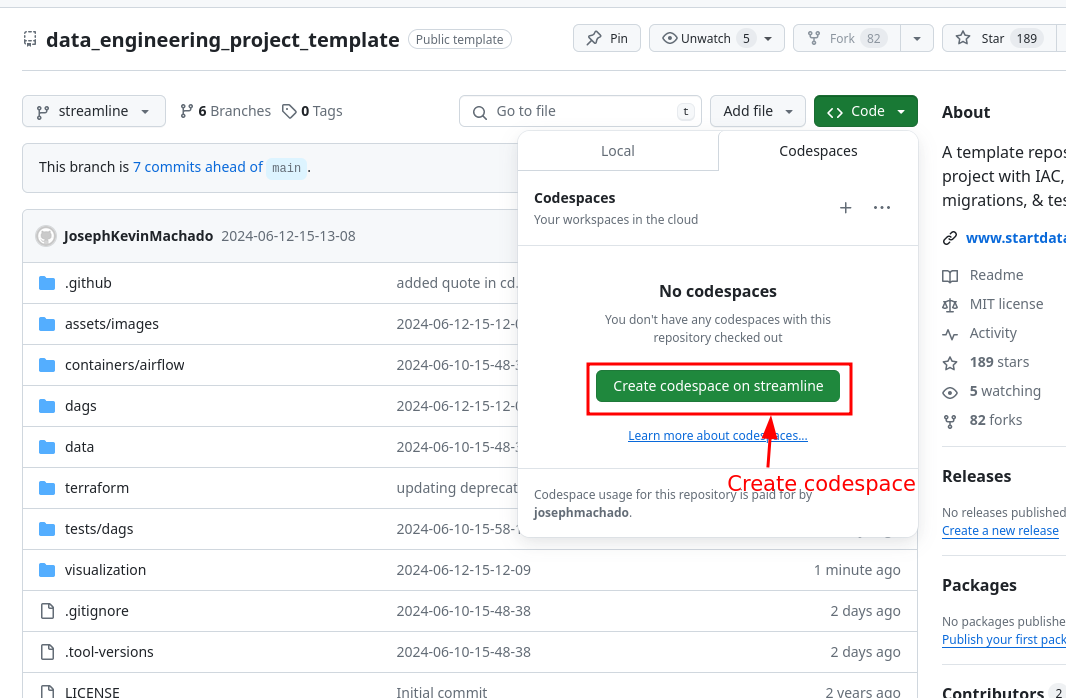
- Create codespaces by going to the data_engineering_project_template repository, cloning it(or click
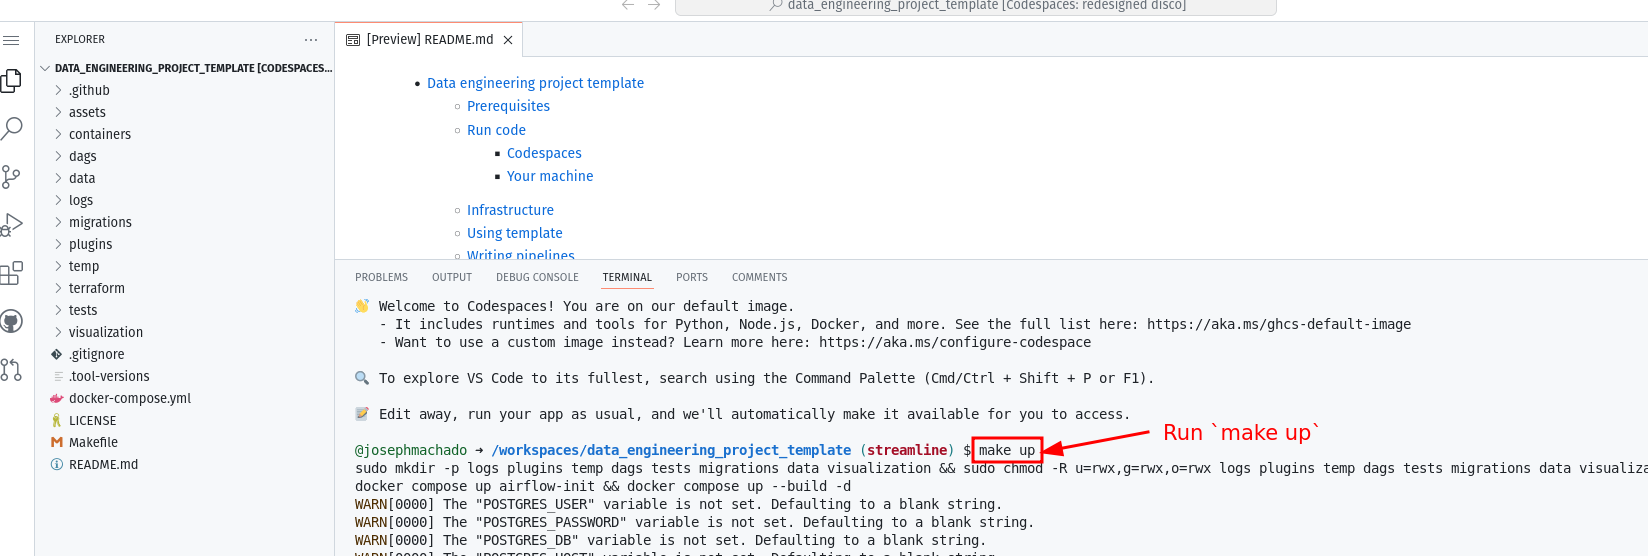
Use this templatebutton) and then clicking onCreate codespaces on mainbutton. - Wait for codespaces to start, then in the terminal type
make up. - Wait for
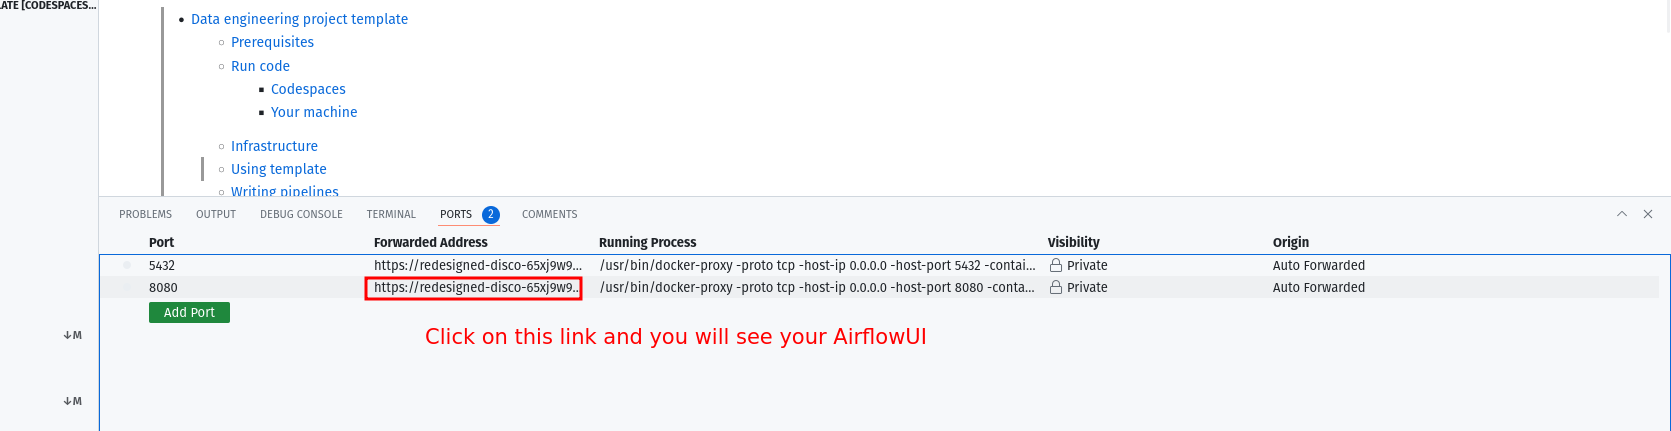
make upto complete, and then wait for 30s (for Airflow to start). - After 30s go to the
portstab and click on the link exposing port8080to access Airflow UI (username and password isairflow).
2.2. Run locally
To run locally, you need:
- git
- Github account
- Docker with at least 4GB of RAM and Docker Compose v1.27.0 or later
Clone the repo and run the following commands to start the data pipeline:
Go to http:localhost:8080 to see the Airflow UI. Username and password are both airflow.
3. Architecture and services in this template
This data engineering project template, includes the following:
Airflow: To schedule and orchestrate DAGs.Postgres: To store Airflow’s details (which you can see via Airflow UI) and also has a schema to represent upstream databases.DuckDB: To act as our warehouseQuarto with Plotly: To convert code inmarkdownformat to html files that can be embedded in your app or servered as is.cuallee: To run data quality checks on the data we extracted from CoinCap API.minio: To provide an S3 compatible open source storage system.
For simplicity services 1-5 of the above are installed and run in one container defined here.
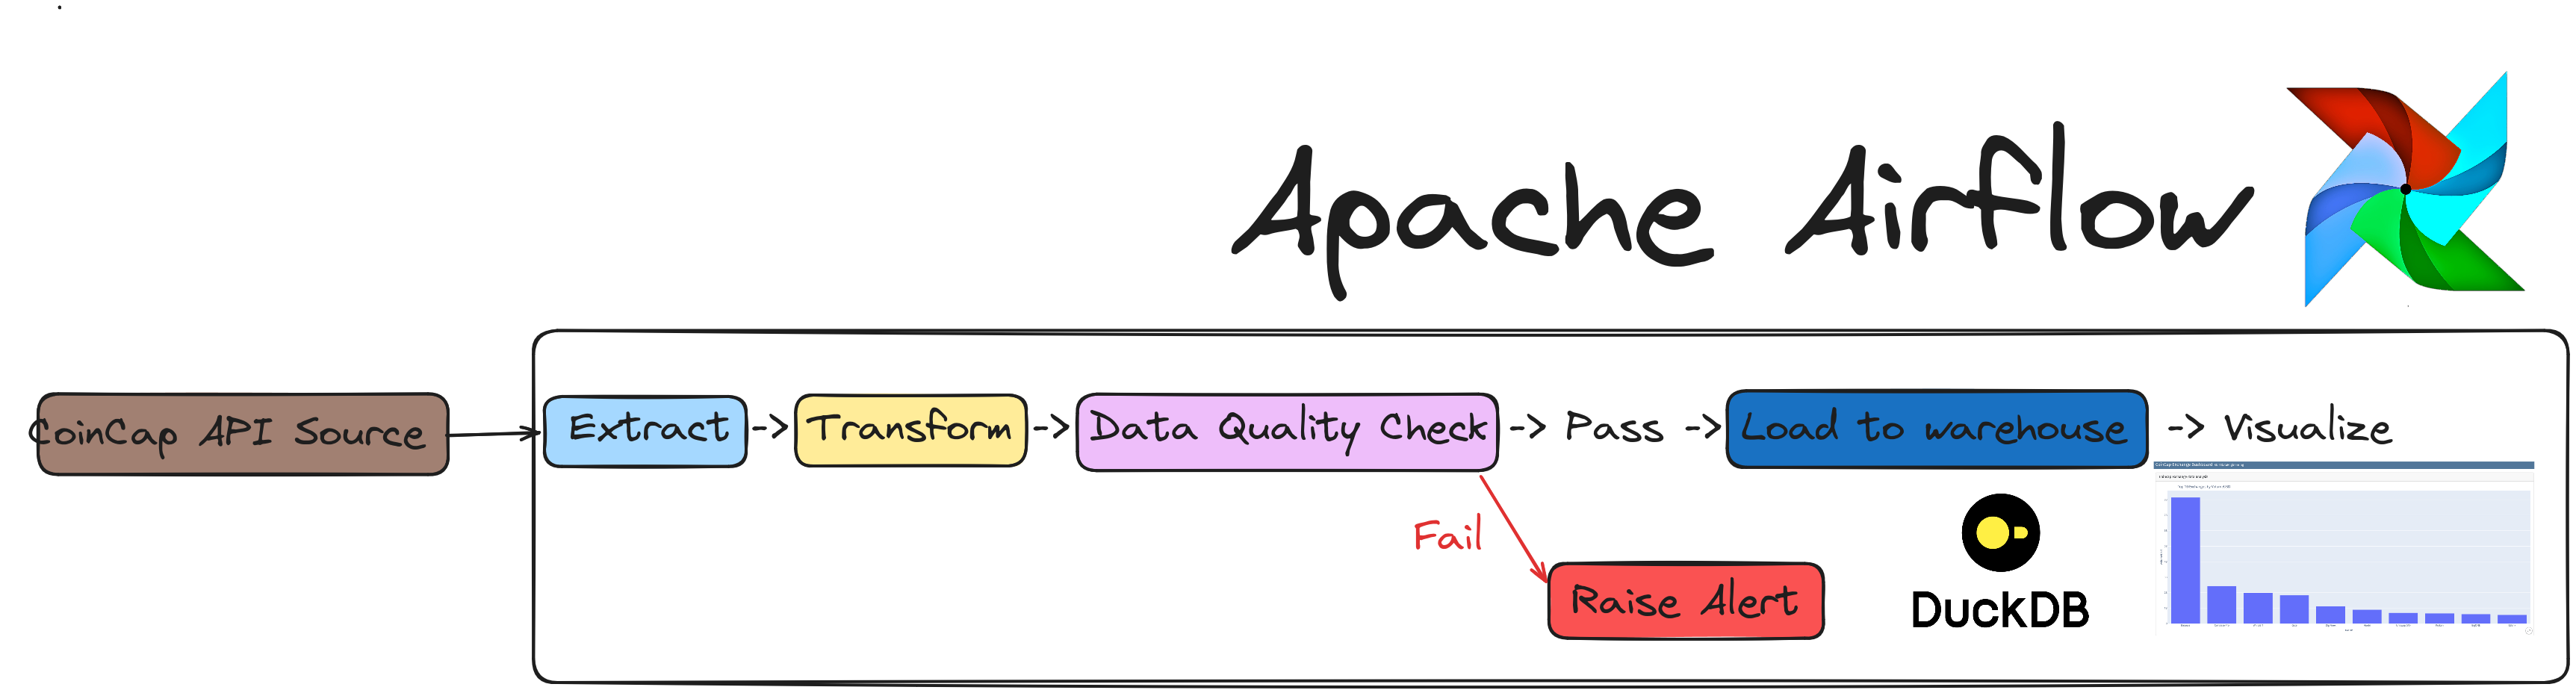
The coincap_elt DAG in the Airflow UI will look like the below image:
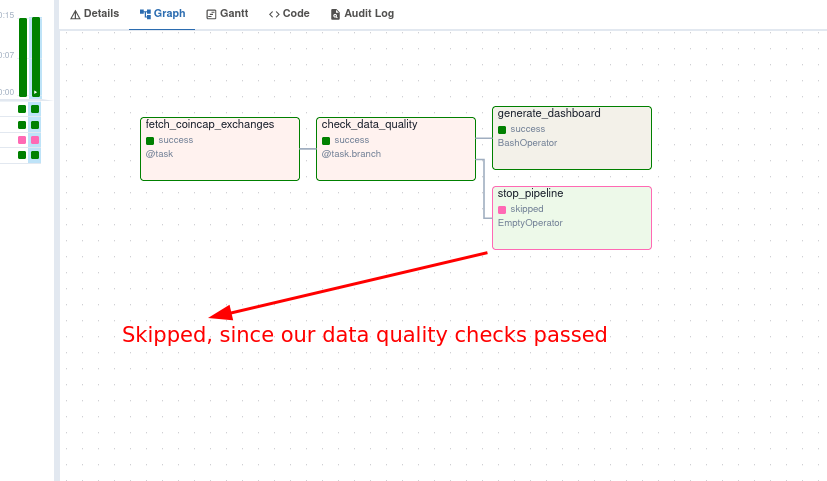
You can see the rendered html at ./visualizations/dashboard.html.
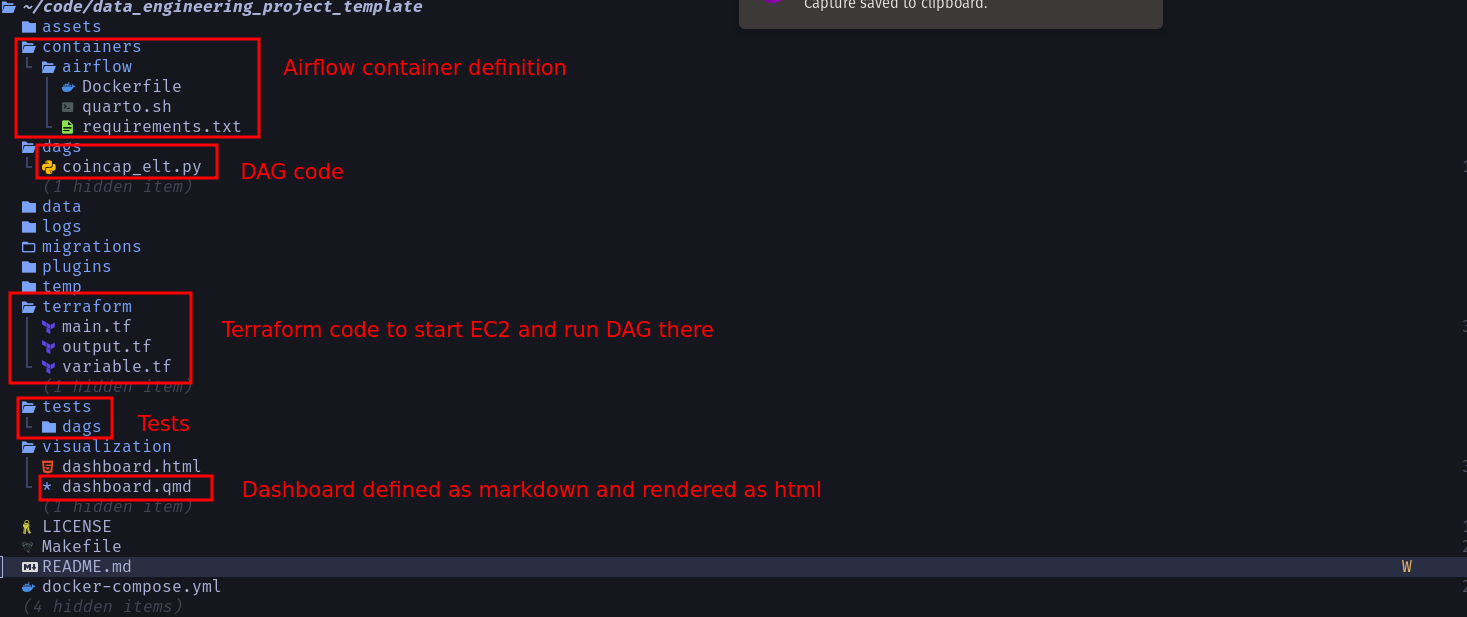
The file structure of our repo is as shown below:
4. CI/CD setup
We set up the development flow to make new feature releases easy and quick. We will use
- git for version control
- GitHub for hosting our repository, GitHub-flow for developing new features, and
- Github Actions for CI/CD.
We have the CI and CD workflows commented out, uncomment them if you want to setup CI/CD for your pipelines.
4.1. CI: Automated tests & checks before the merge with GitHub Actions
Note: Read this article that goes over how to use GitHub actions for CI.
Continuous integrations in our repository represent the automated code testing before merging into the main branch (which runs in the production server). In our template, we have defined formatting (isort, black), type checking (mypy), lint/Style checking (flake8), & python testing (pytest) as part of our ci.
We use GitHub actions to run the checks automatically when someone creates a pull request. The CI workflow is defined in this ci.yml file.
4.2. CD: Deploy to production servers with GitHub Actions
Continuous delivery in our repository means deploying our code to the production server. We use EC2 running docker containers as our production server; After merging into the main branch, our code is copied to the EC2 server using cd.yml.
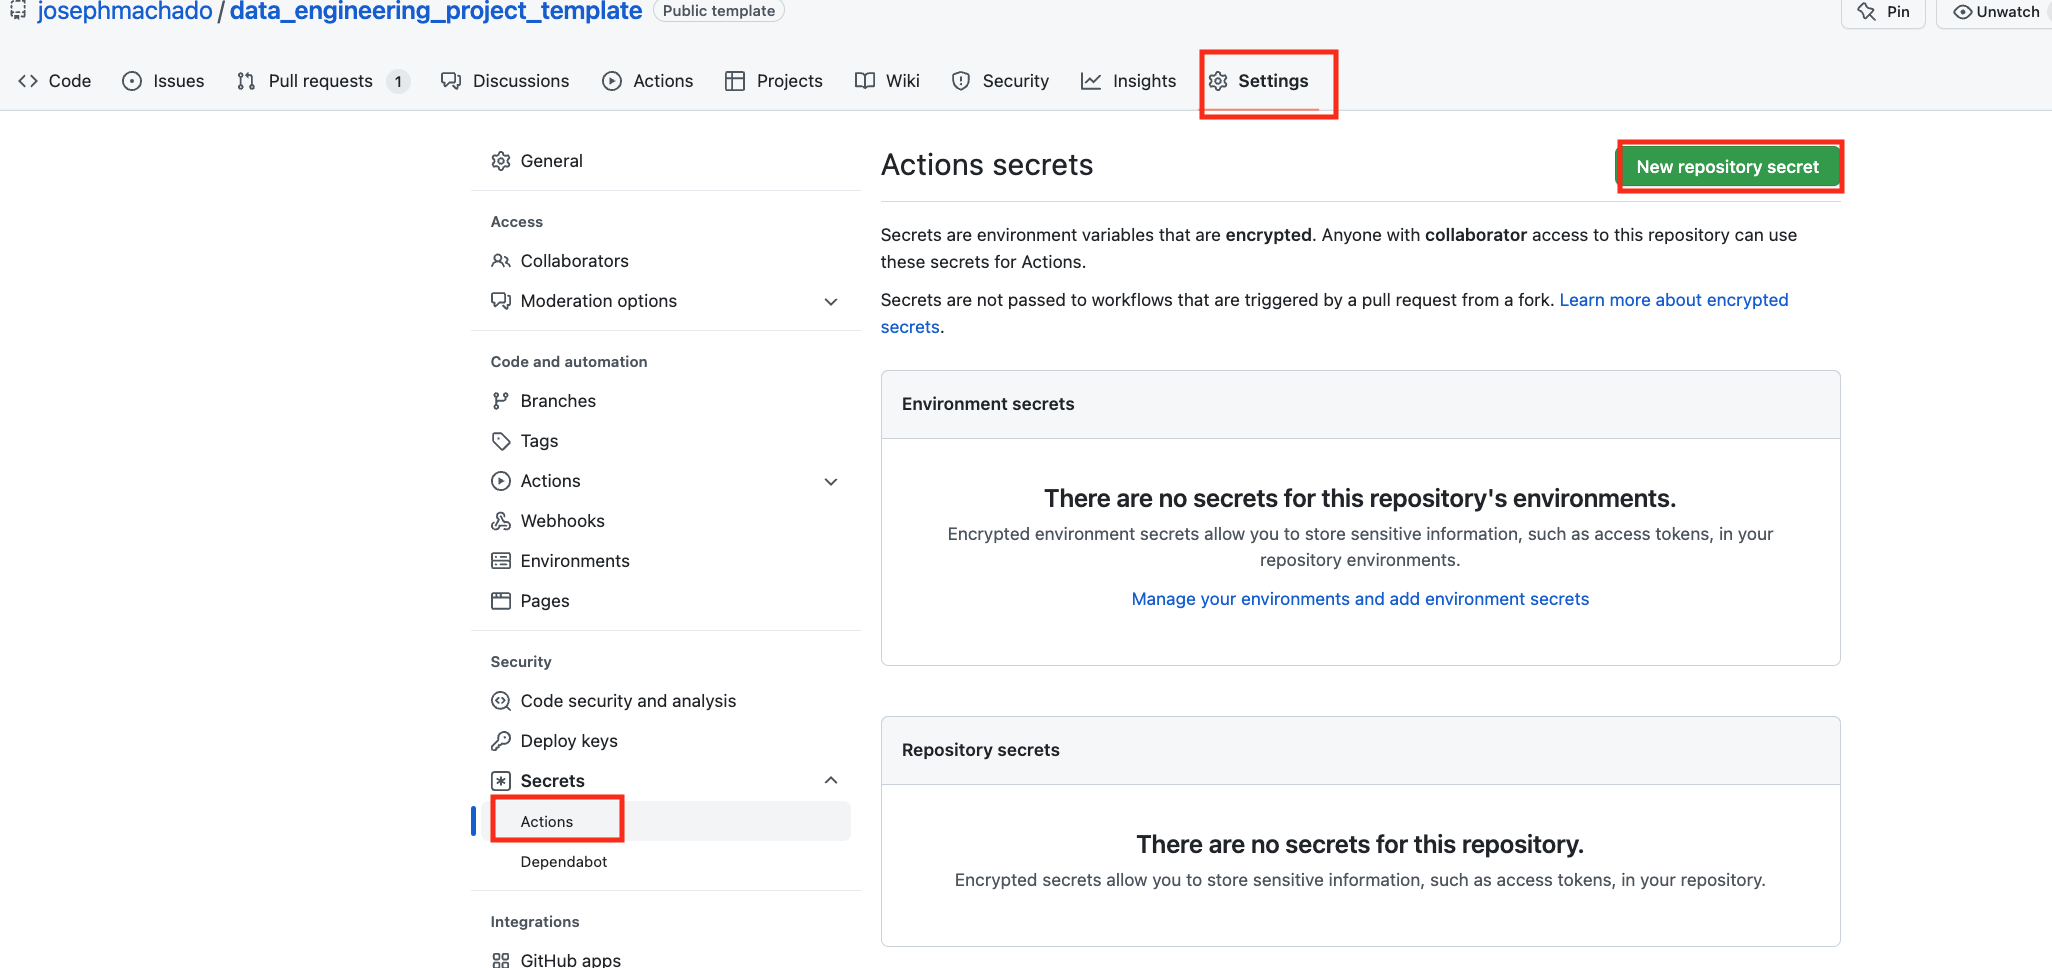
Note that for our CD to work, we will first need to set up the infrastructure with terraform, & defined the following repository secrets. You can set up the repository secrets by going to Settings > Secrets > Actions > New repository secret.
SERVER_SSH_KEY: We can get this by runningterraform -chdir=./terraform output -raw private_keyin the project directory and paste the entire content in a new Action secret calledSERVER_SSH_KEY.REMOTE_HOST: Get this by runningterraform -chdir=./terraform output -raw ec2_public_dnsin the project directory.REMOTE_USER: The value for this is ubuntu.
5. Putting it all together with a Makefile
We use a Makefile to define aliases for the commands used during development and CI/CD.
6. Data projects using other tools and services
While an Airflow + Postgres warehouse setup might be sufficient for most practice projects, here are a few projects that use different tools with managed services.
| Component | Beginner DE project | Project to impress HM manager | dbt DE project |
|---|---|---|---|
Scheduler |
Airflow | cron | - |
Executor |
Apache Spark, DuckDB | Python process | DuckDB |
Orchestrator |
Airflow | - | dbt |
Source |
Postgres, CSV, S3 | API | flat file |
Destination |
DuckDB | DuckDB | DuckDB |
Visualization/BI tool |
Quarto | Metabase | - |
Data quality checks |
- | - | dbt tests |
Monitoring & Alerting |
- | - | - |
All of the above projects use the same tools for data infrastructure setup.
local development: Docker & Docker composeIAC: TerraformCI/CD: Github ActionsTesting: PytestFormatting: isort & blackLint check: flake8Type check: mypy
7. Conclusion
To recap, we saw
The next time you start a new data project or join an existing data team, look for these components to make developing data pipelines quick and easy.
This article helps you understand how to set up data infrastructure with code, how developers work together on new features to data pipeline, & how to use the GitHub template for your data projects.
If you have any questions or comments, please leave them in the comment section below.