1. Introduction
Automated testing is crucial for ensuring that your code is bug-free and avoiding regressions. If you are wondering
How can data tests be integrated into a CI (Continuous Integration) pipeline?
How does a typical CI system work?
Then this post is for you. By the end of this blog post, you will understand what CI is, why it is important and how to create a CI pipeline to run tests automatically when there is a pull-request.
2. CI
CI stands for continuous integration. It is a dev-ops best practice of continually testing and making sure a development branch is ready to be merged into the main branch.
When developers create a new pull request, the CI platform typically does the following steps:
- Spin up the new container(s)
- Clones the code into the container
- Runs tests (including checks)
- If all tests pass a
check passed✅ will be displayed on your pull request. - If any tests fail a
check failed❌ will be displayed on your pull request. You can prevent the merge of failing branches by setting up protected branches.
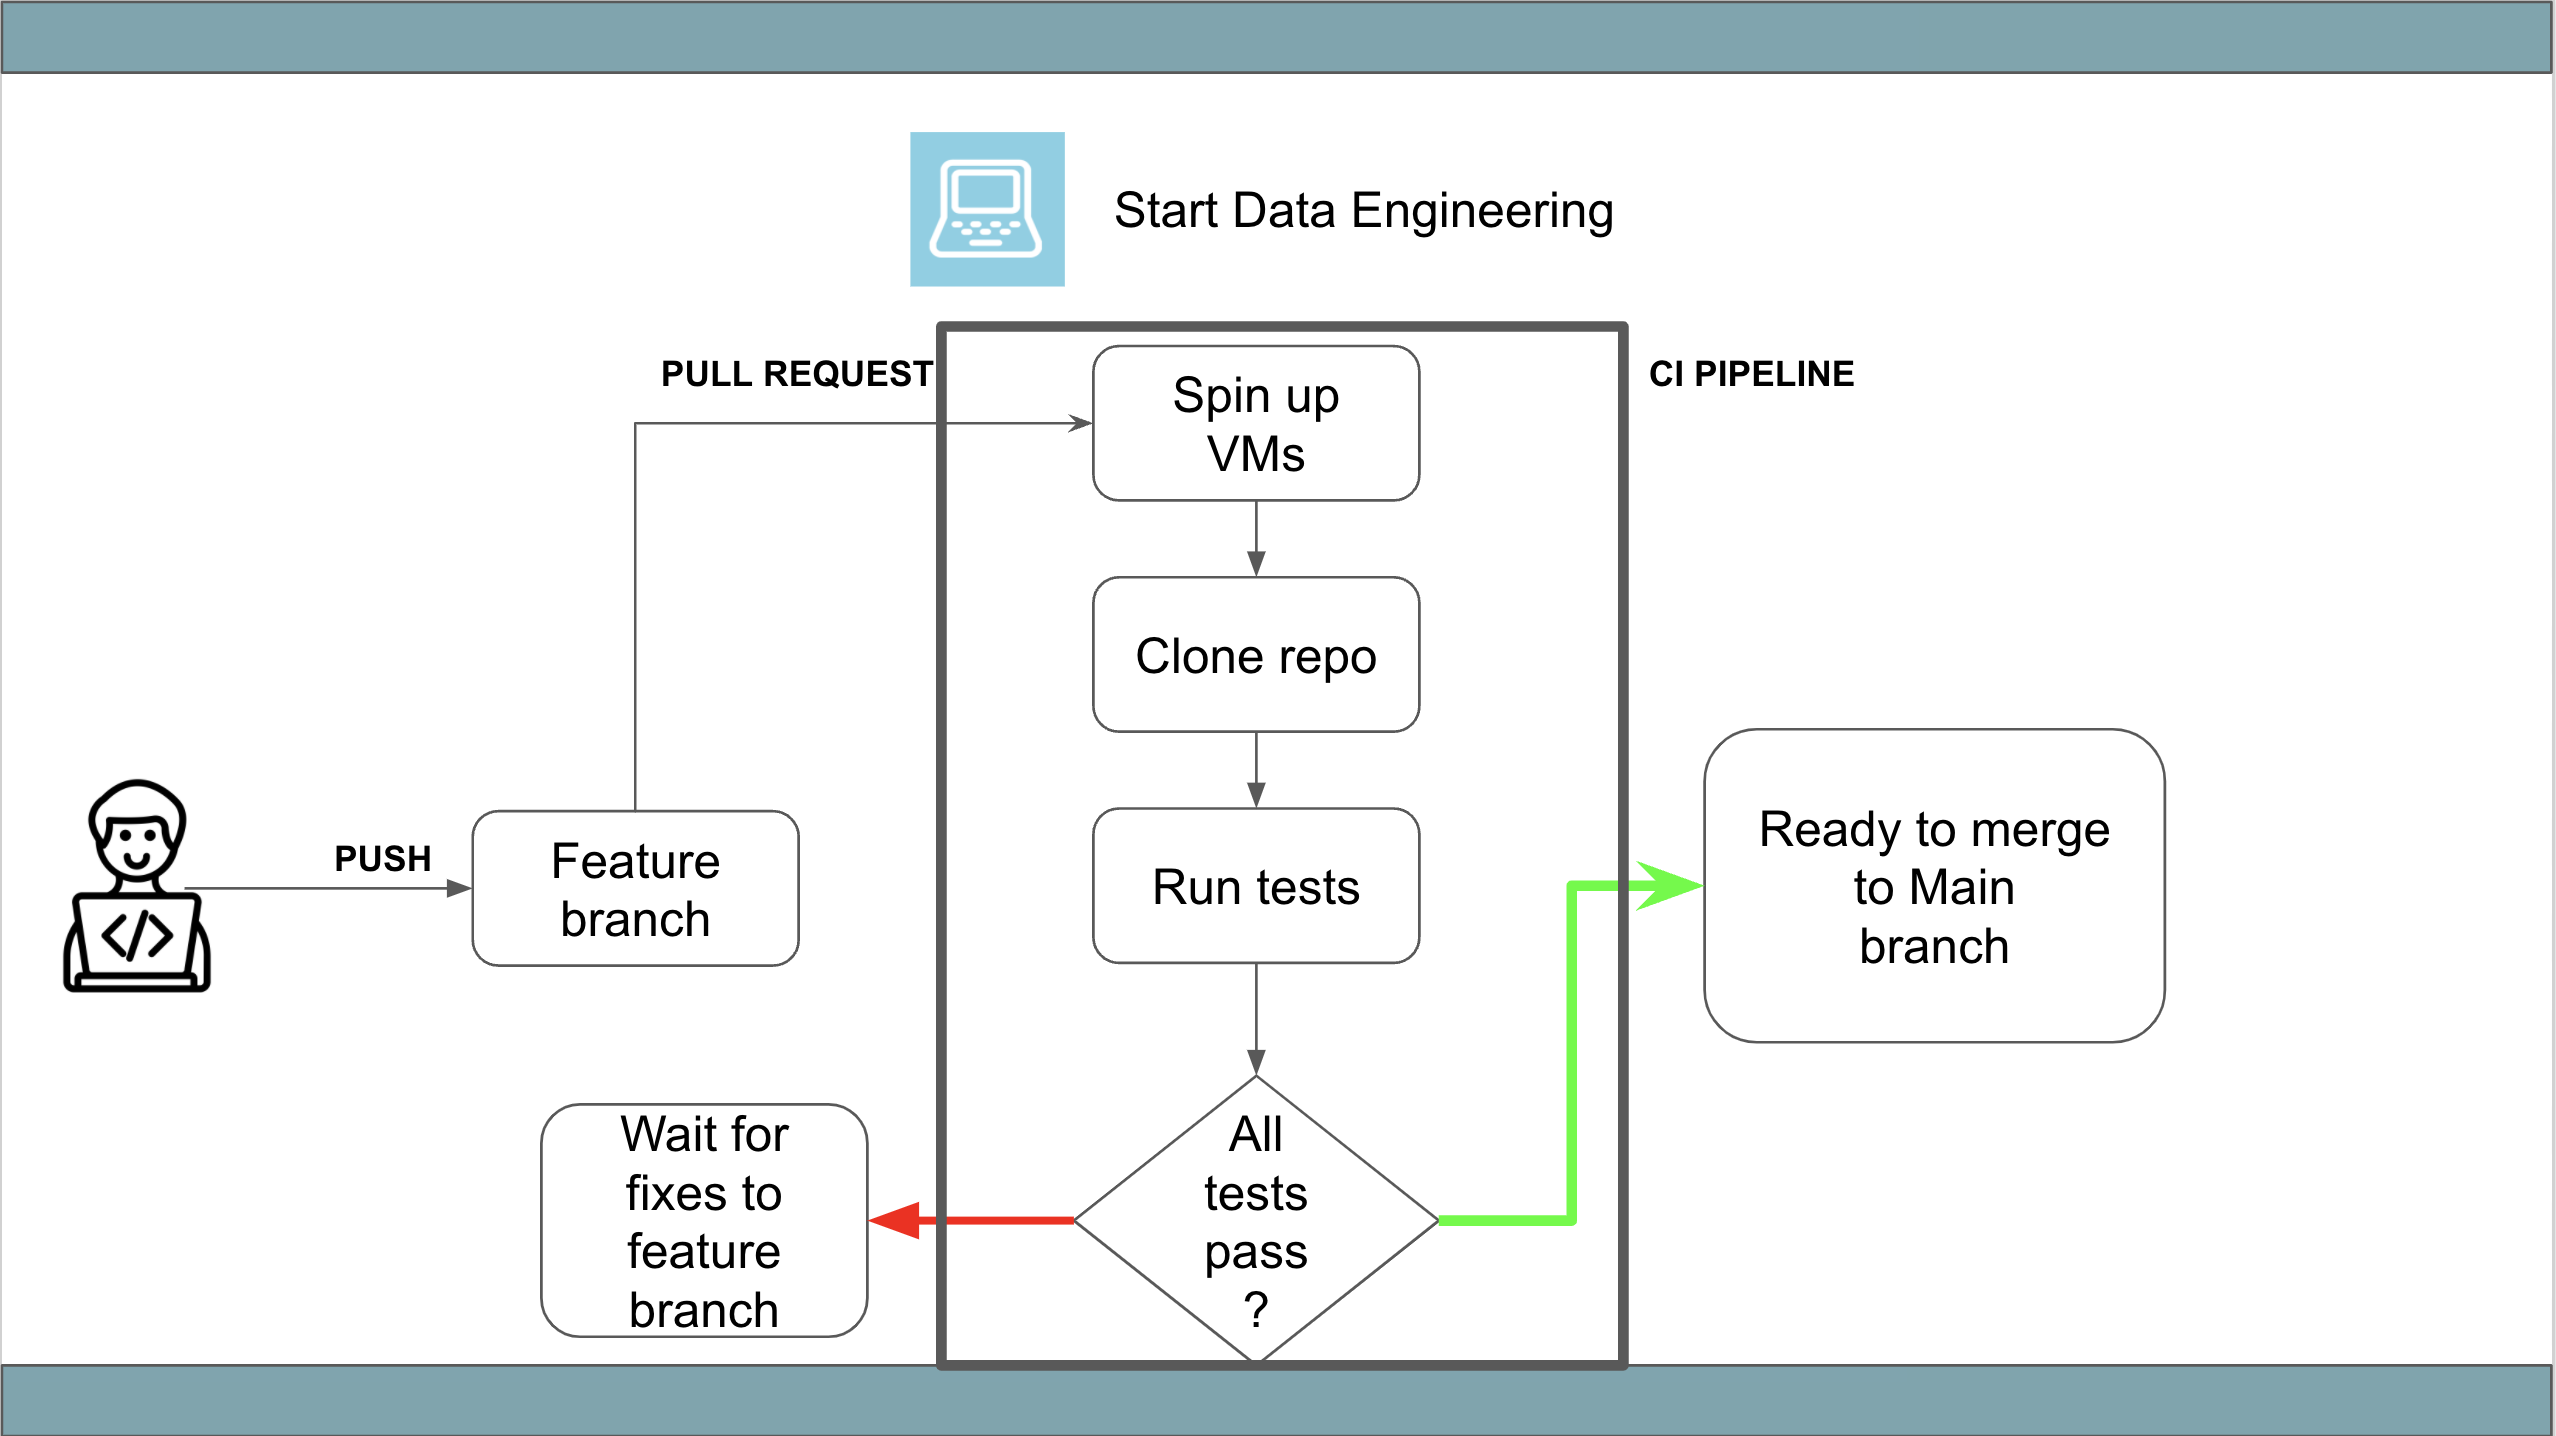
The key components of a CI pipeline are:
CI platform: These platforms handle spinning up the VMs, alerting on pass/fail, etc. There are many CI/CD platforms available. E.g. Jenkins, Github Actions, circleCI, AWS Code Pipeline, etcVirtual machines: You can configure the types of virtual machines that you want to run your tests on. These VMs can be run on any service that can create VMs, eg AWS ECS, AWS EC2, etc.
Github actions provide us with some standard VMs we can use, without setting up any infrastructure.
You can see how having tests as part of CI ensures that we do not inadvertently introduce bugs, ensuring that your code is bug-free and avoiding regressions.
3. Sample project: Data testing with Github Actions
3.1. Prerequisites
- git
- Github account
- Docker and Docker Compose v1.27.0
Set up your repository as shown below.
git clone https://github.com/josephmachado/data_test_ci.git # clone sample code
cd data_test_ci
rm -rf .git
git init
git add .
git commit -m 'Sample project for data tests on CI'
# Create a new repository on github.com
git remote add origin https://github.com/your-github-user-id/your-repo-name.git # replace your-github-user-id with your id and your-repo-name with the repo you created
git branch -M main
git push -u origin main
3.2. Project overview
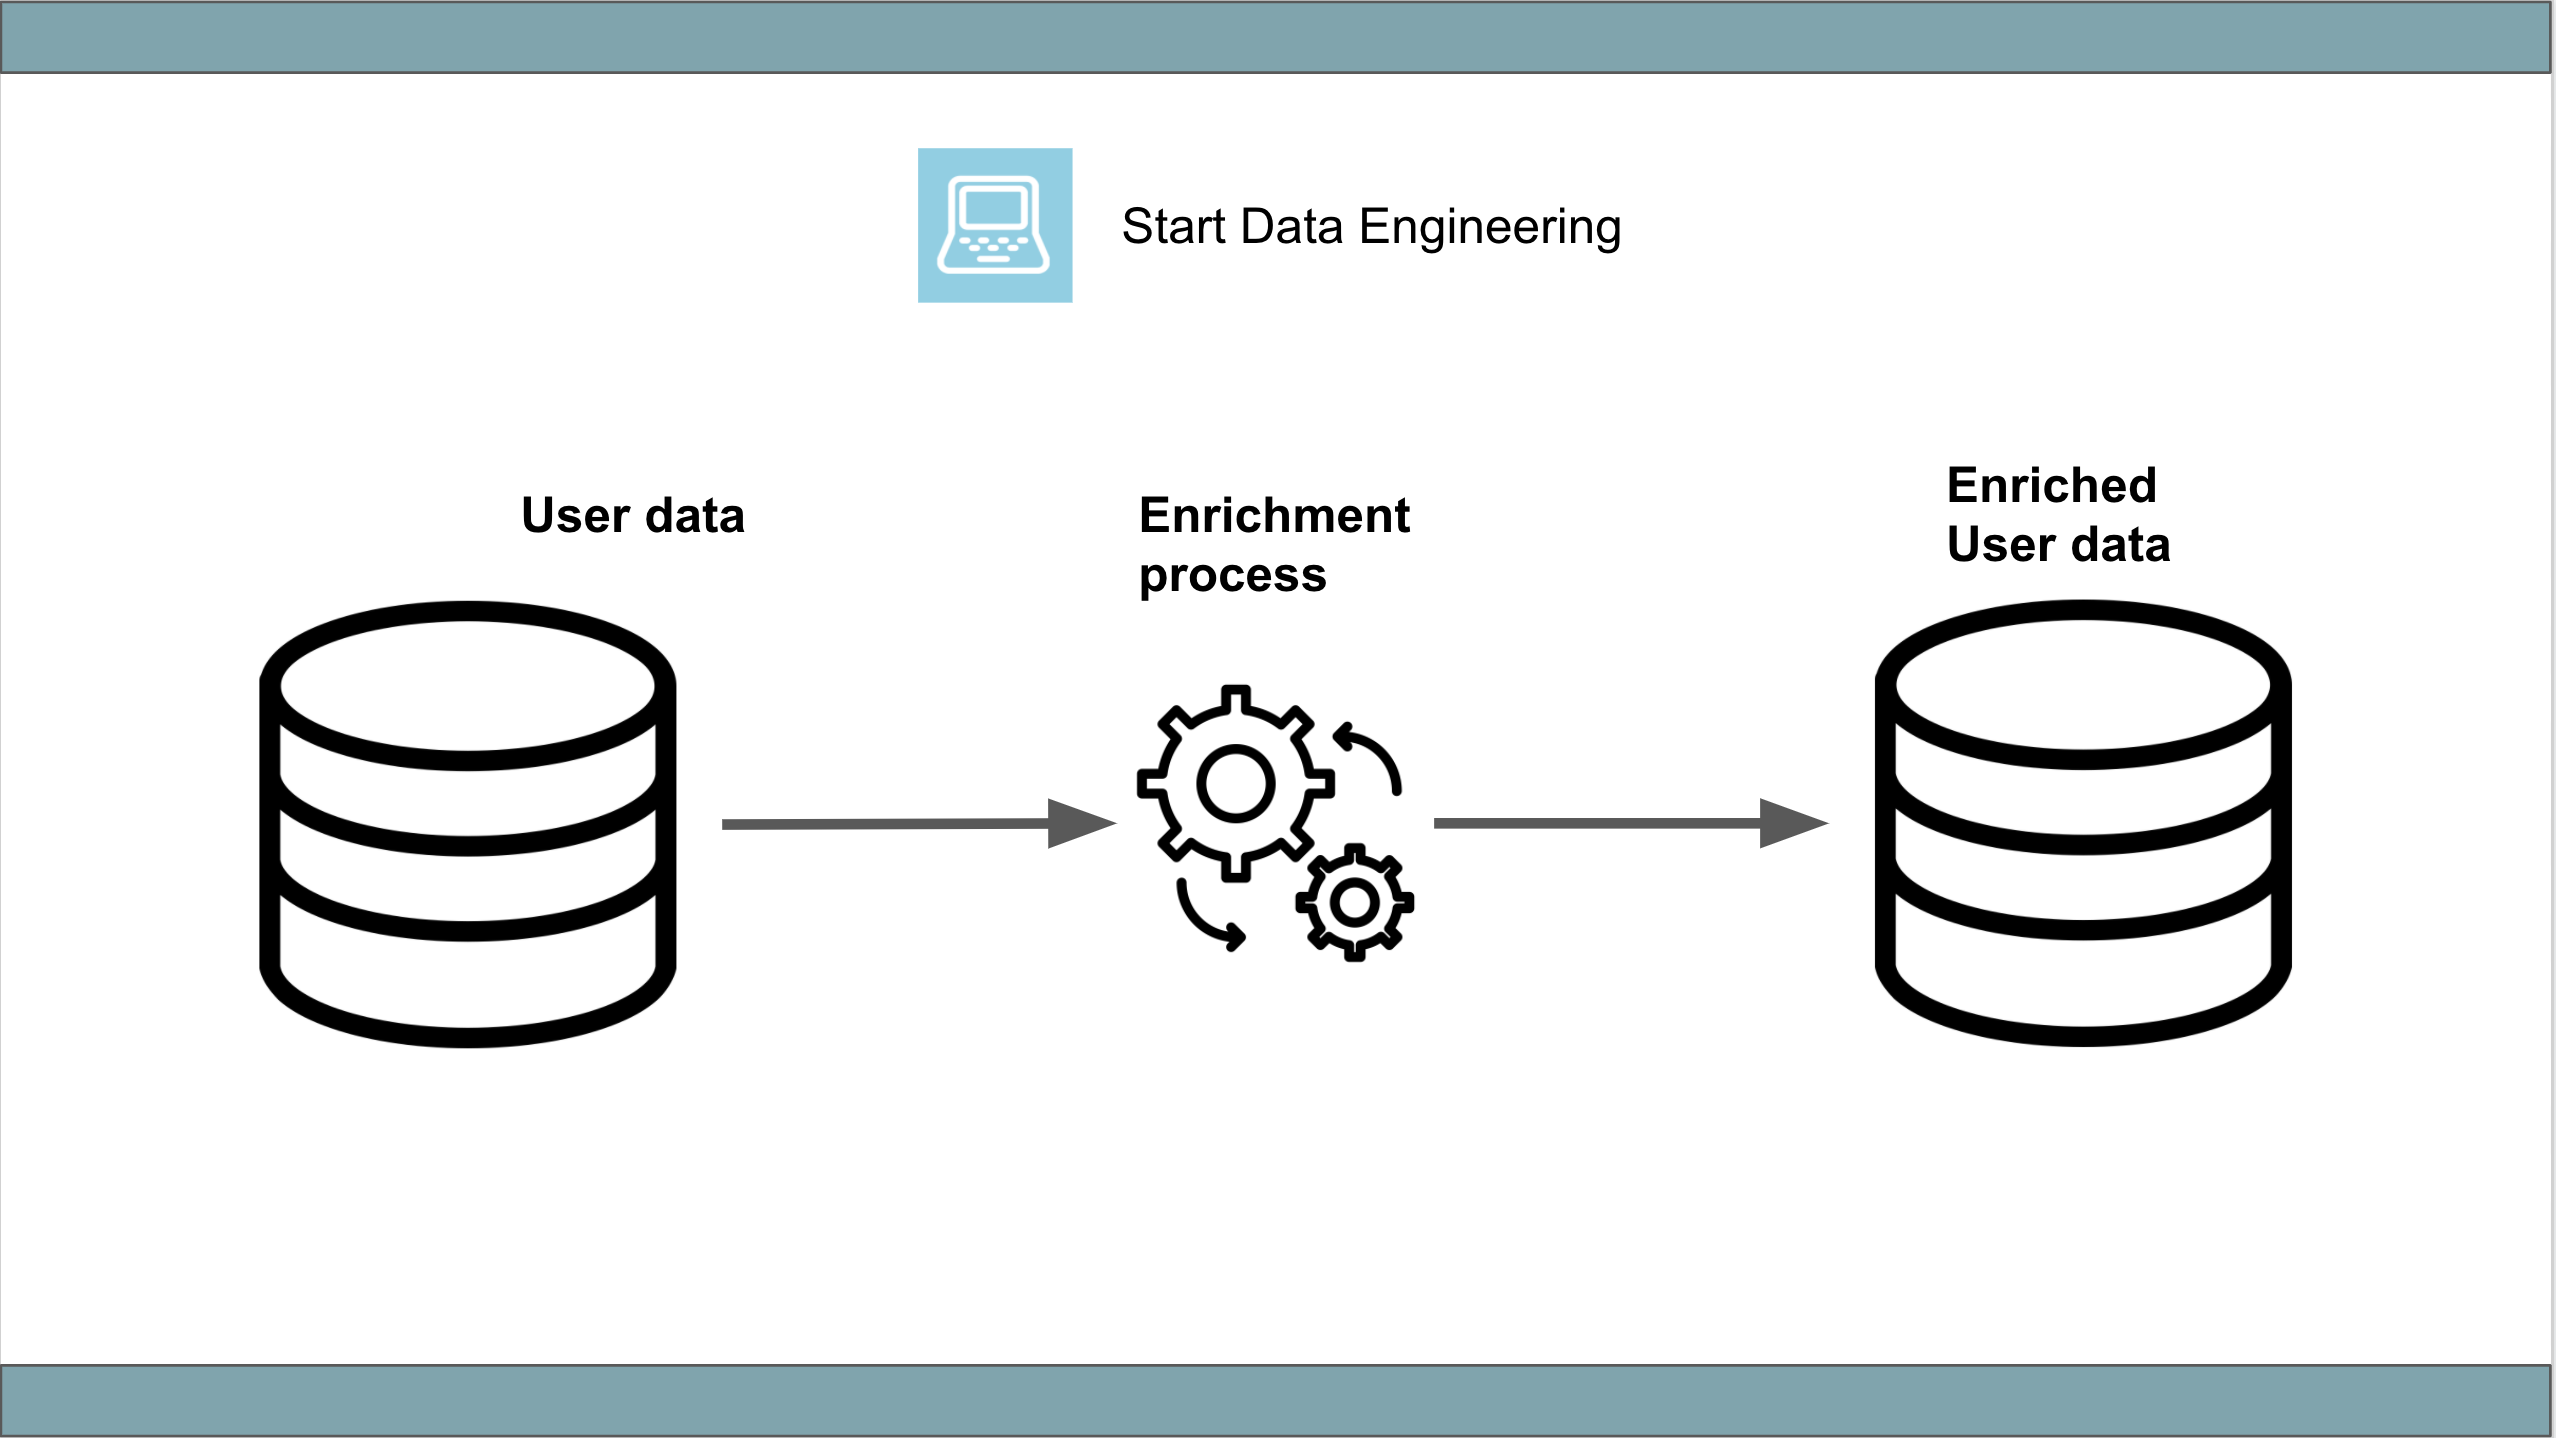
This data pipeline pulls data from a table (user), enriches it, and loads it into another table(enriched_data).
The python process to enrich data and the database are set up as docker containers. Use the command below to set them up.
The Makefile contains common commands such as formatting the code, running type & lint checks, and running our test suite.
3.3. Automating data tests with Github Actions
The workflow should be defined in this path .github/workflows/. Our workflow file, named ci.yml is shown below:
The on field specifies the actions (pull-request in our case) that are supposed to trigger this workflow. Our workflow has one job, run-ci-tests, which involves:
- Creating a virtual machine running
ubuntu. Checkout repo: Cloning our repository to the virtual machine. The virtual machine has docker installed.Spin up containers: Runningmake upwhich is the command to spin up our Postgres and Python containersRun CI tests: Runningmake ciwhich is the command to format the code, check typing, check the formatting, and run python tests.
When you create a pull-request, the jobs defined in our workflow file will be run. Use the commands below to put up a PR.
Go to your repository on Github, click on Pull requests and click on Compare & pull request, and then click on the Create pull request button. This will trigger the workflow.
Clicking on the Details button on the Github UI in the run-ci-tests job section shows the steps that were run. The Setup job and Complete job steps are always run before and after our defined steps.
| Click CI details | CI with our defined steps |
|---|---|
 |
 |
4. Conclusion
To recap, in this article we saw
- What is a CI pipeline
- Why it is important
- Automating data tests with Github Actions
Hope this article gives you a good idea of what happens as part of a CI pipeline, the different platforms to use to set up CI pipelines, and how you can easily set one up using Github actions.
The next time you are building a data pipeline automate your data tests as part of a CI pipeline, your teammates and future self will thank you.
If you have any questions, comments, or suggestions please leave them in the comment section below.
5. Further reading
- Trying to figure out what data tests to create? read this article.
- Struggling with setting up different components of your data pipeline? checkout this article.
- Trying to set up a CI/CD pipeline for dbt? read this article.
- Wondering how to run unit tests on dbt? checkout this article.