Stitch S3 DB Integration
· 2 min read
Given
- Source S3 path and file delimiter
- data warehouse connection details (endpoint, port, username, password and database name)
- data warehouse schema name and table name
- Run frequency
Steps
- Log into your stitch account, here
- Click on the
Destinationtab and use thedata warehouse connection detailsto establish a destination database. - Click on
Add Integrationbutton on your dashboard.
- Select
Amazon S3 CSVas the integration in the next page.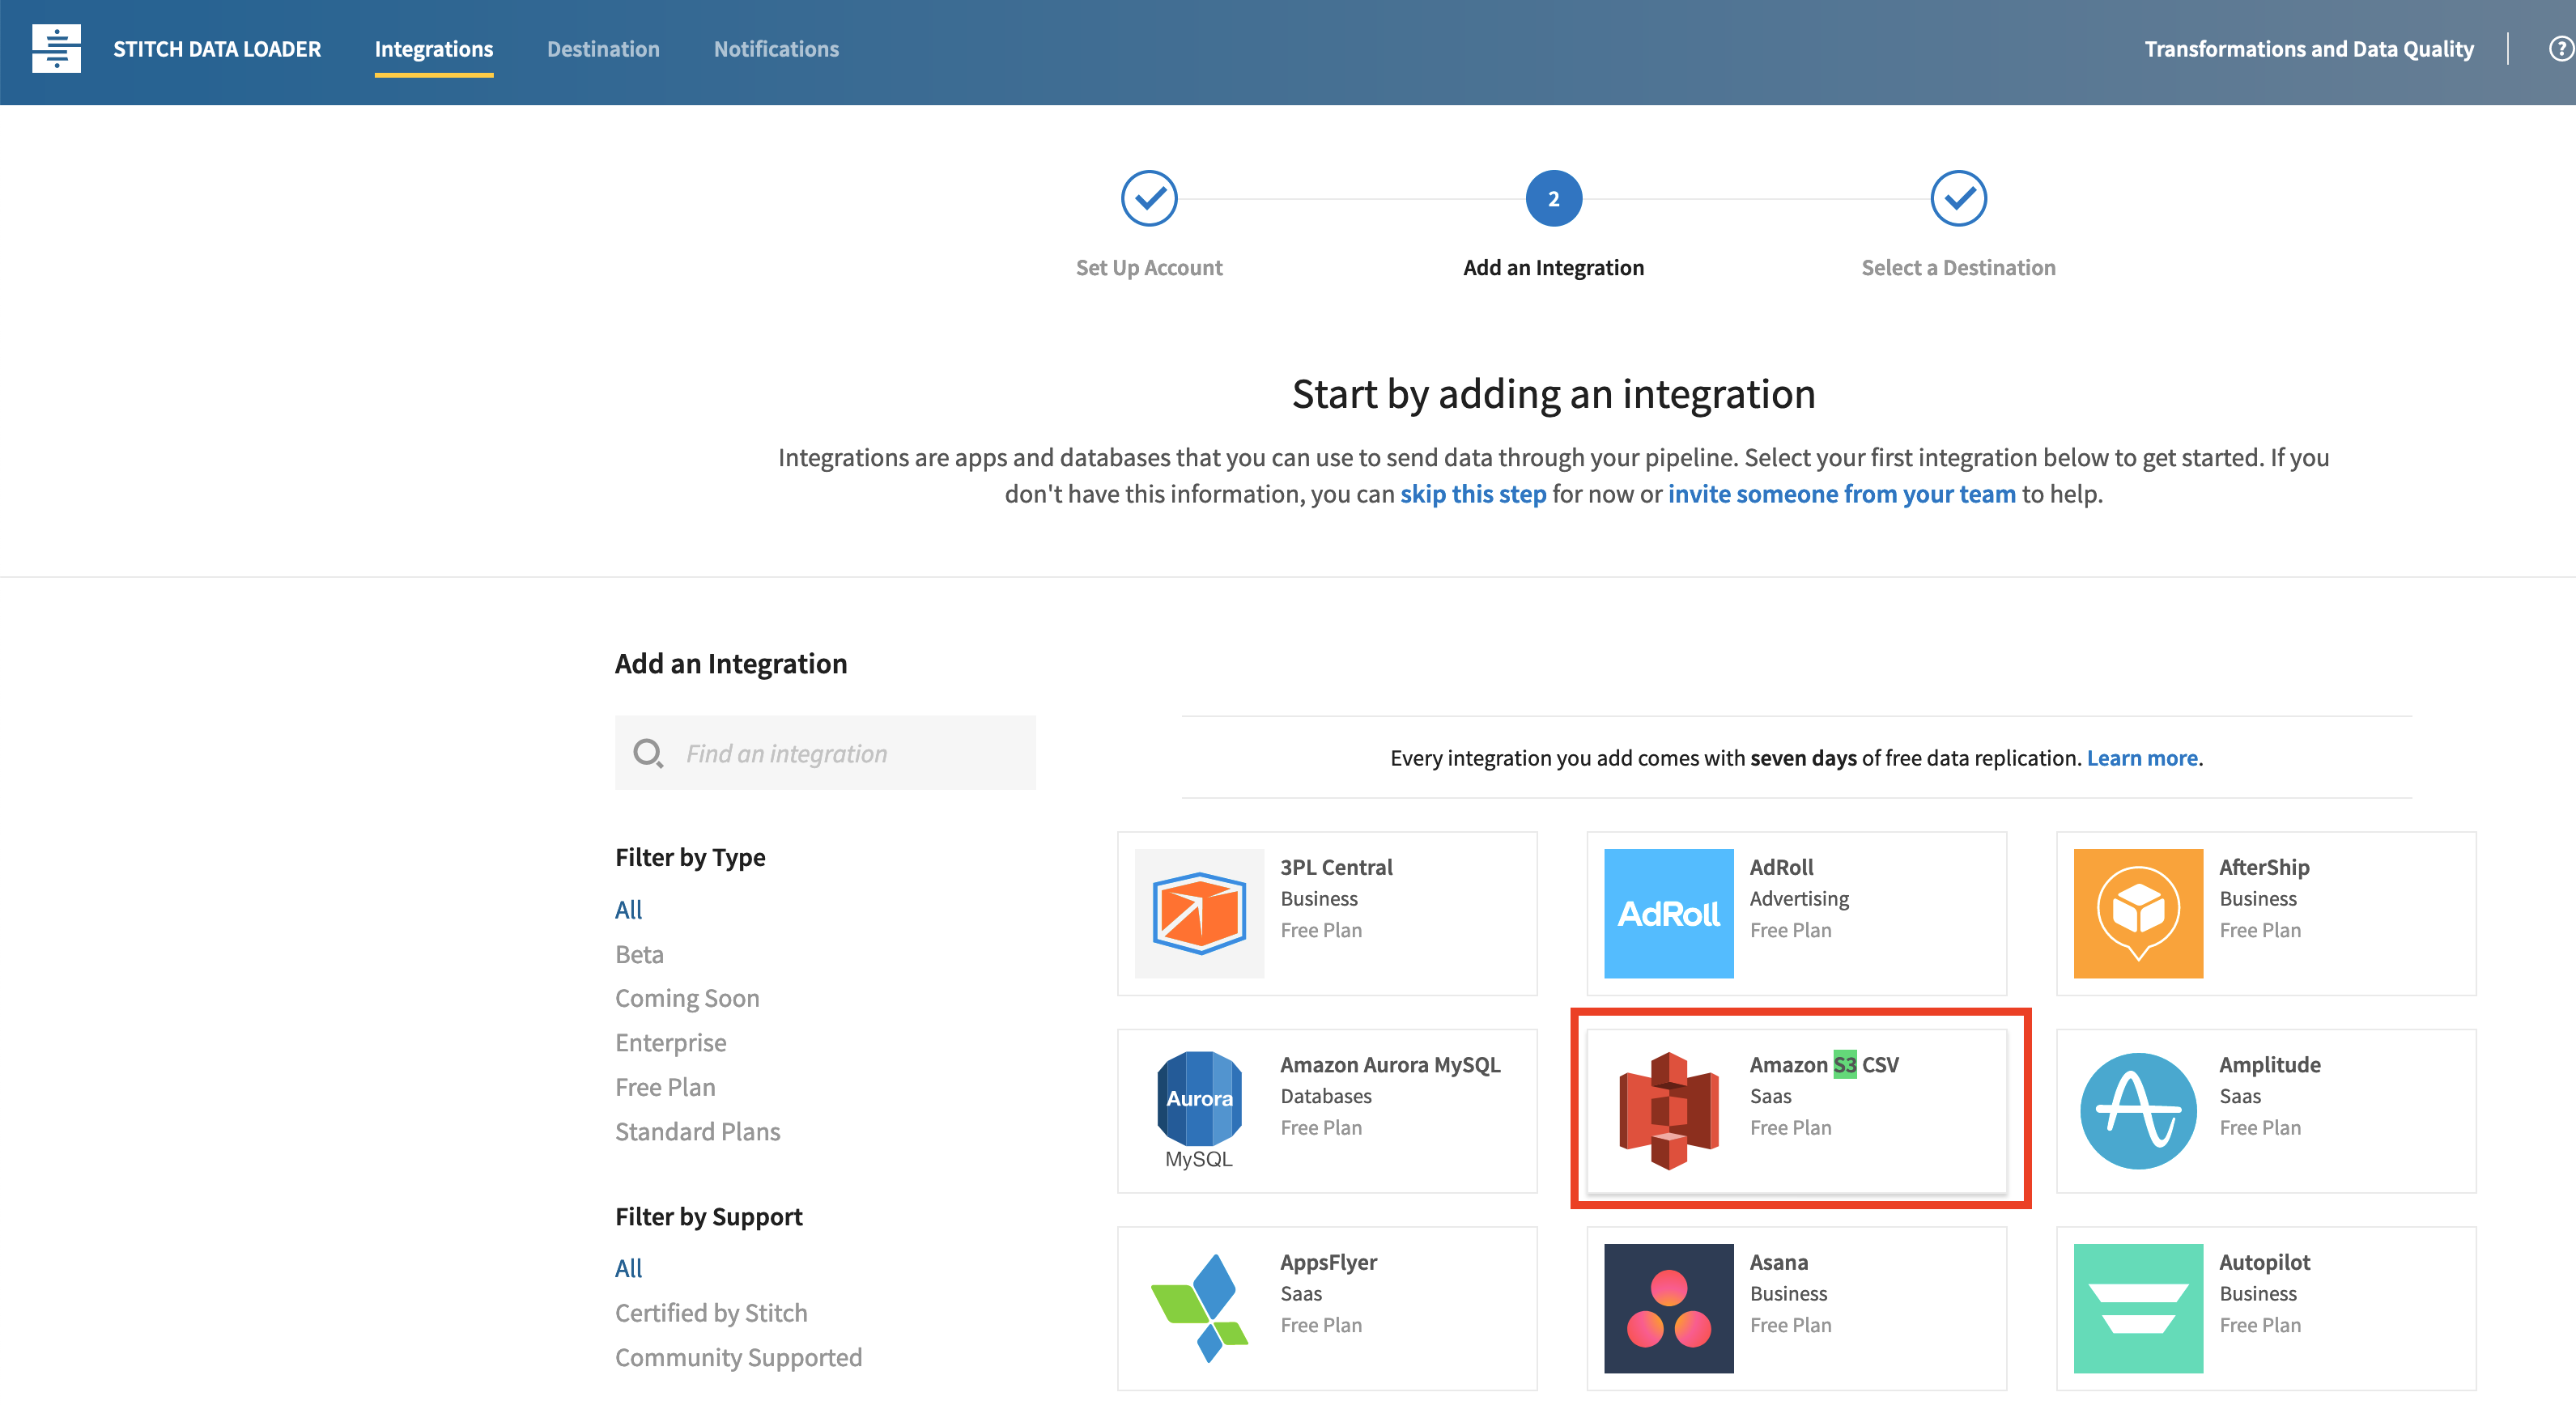
- In the next page, select
Integration Nameby default this will be the name of the schema where the S3 file is going to be copied into. Use the give data warehouse schema name. - In the
Search Patterntype in the file name from the given S3 path. - In the
Table nametype in the given data warehouse table name.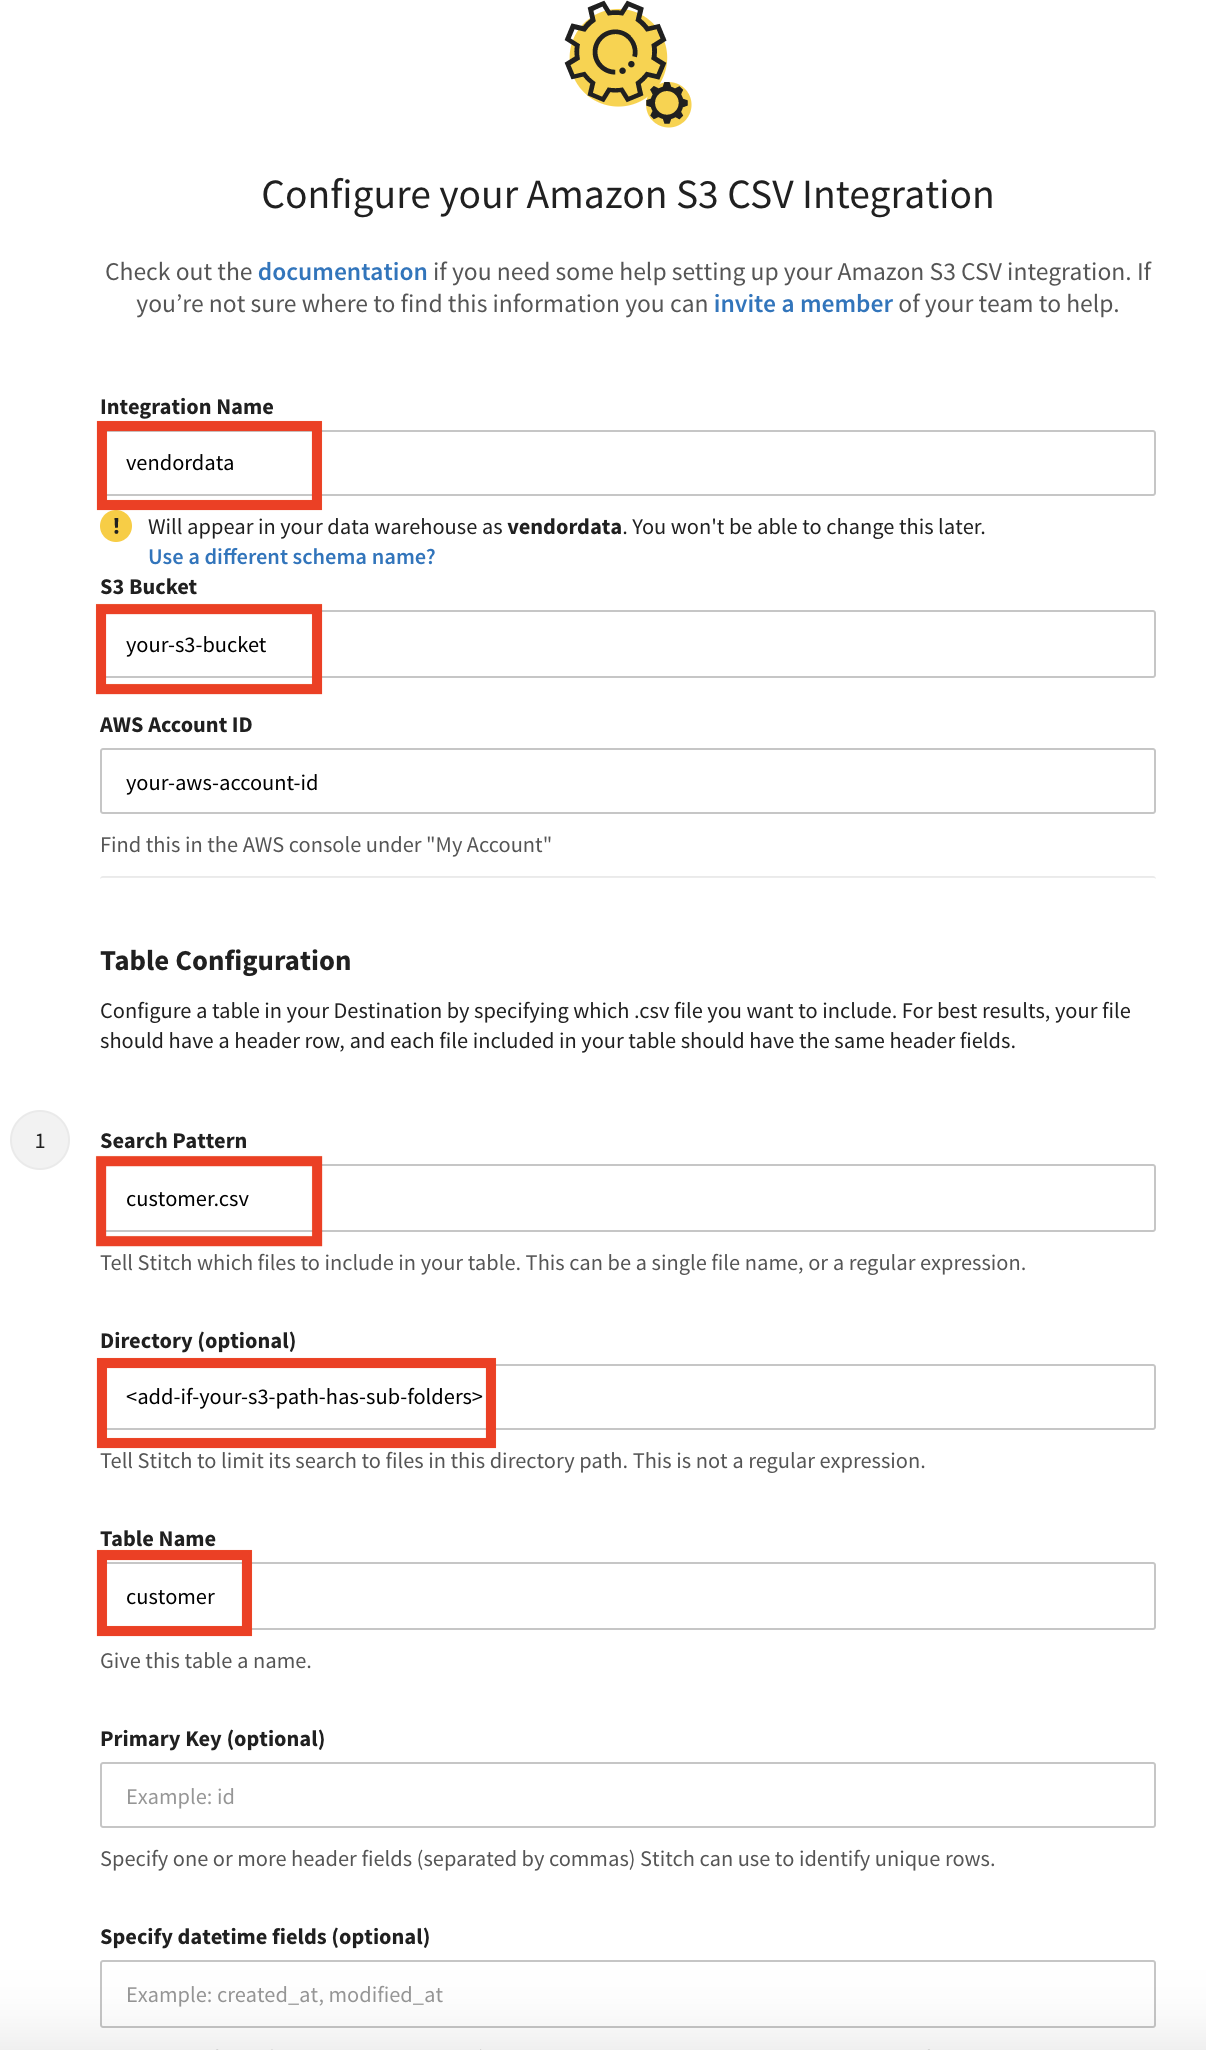
- Use the given file delimiter for the
Delimiteroption, setReplication frequencyto the given replication frequency and click onAuthorize.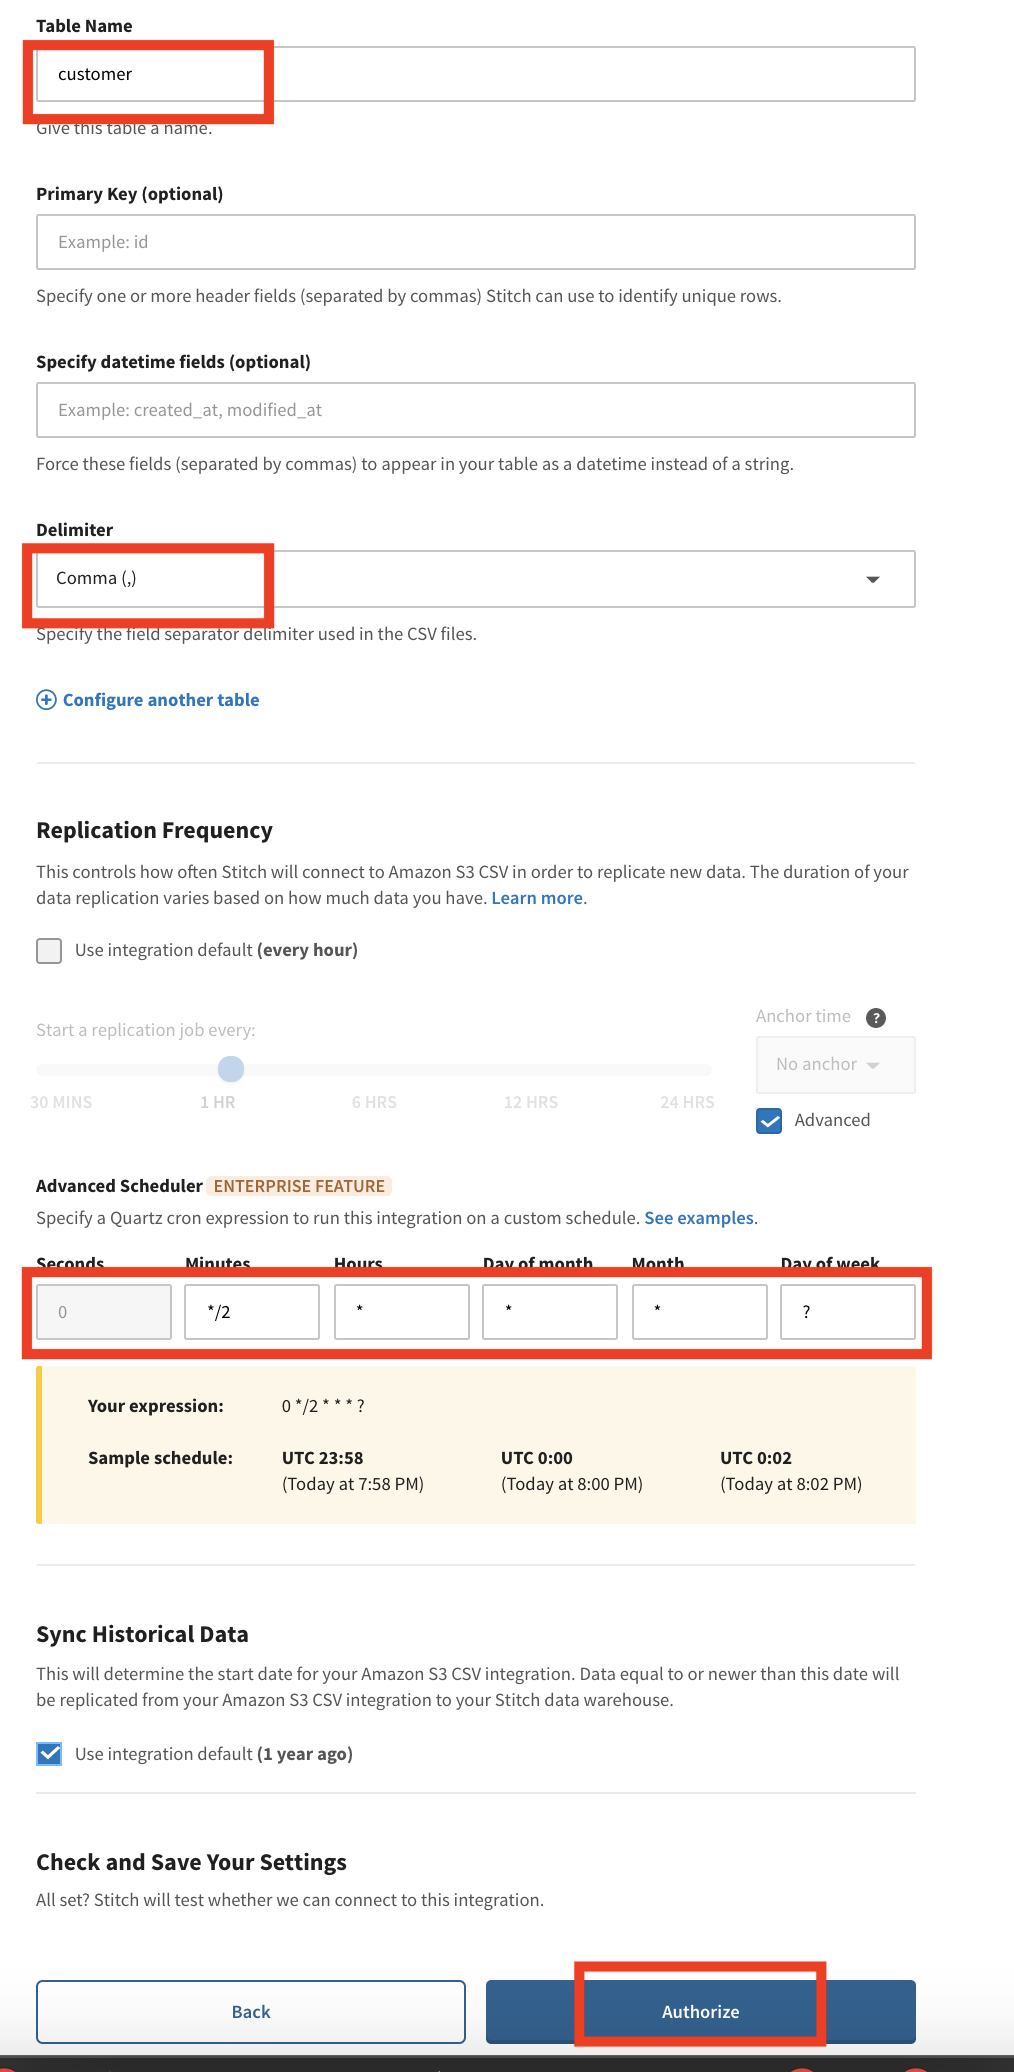
- In the next page you will be provide with details for a
access policyin terms of JSON andaccount id,external idandrole namefor an AWSIAMrole to access your S3 bucket.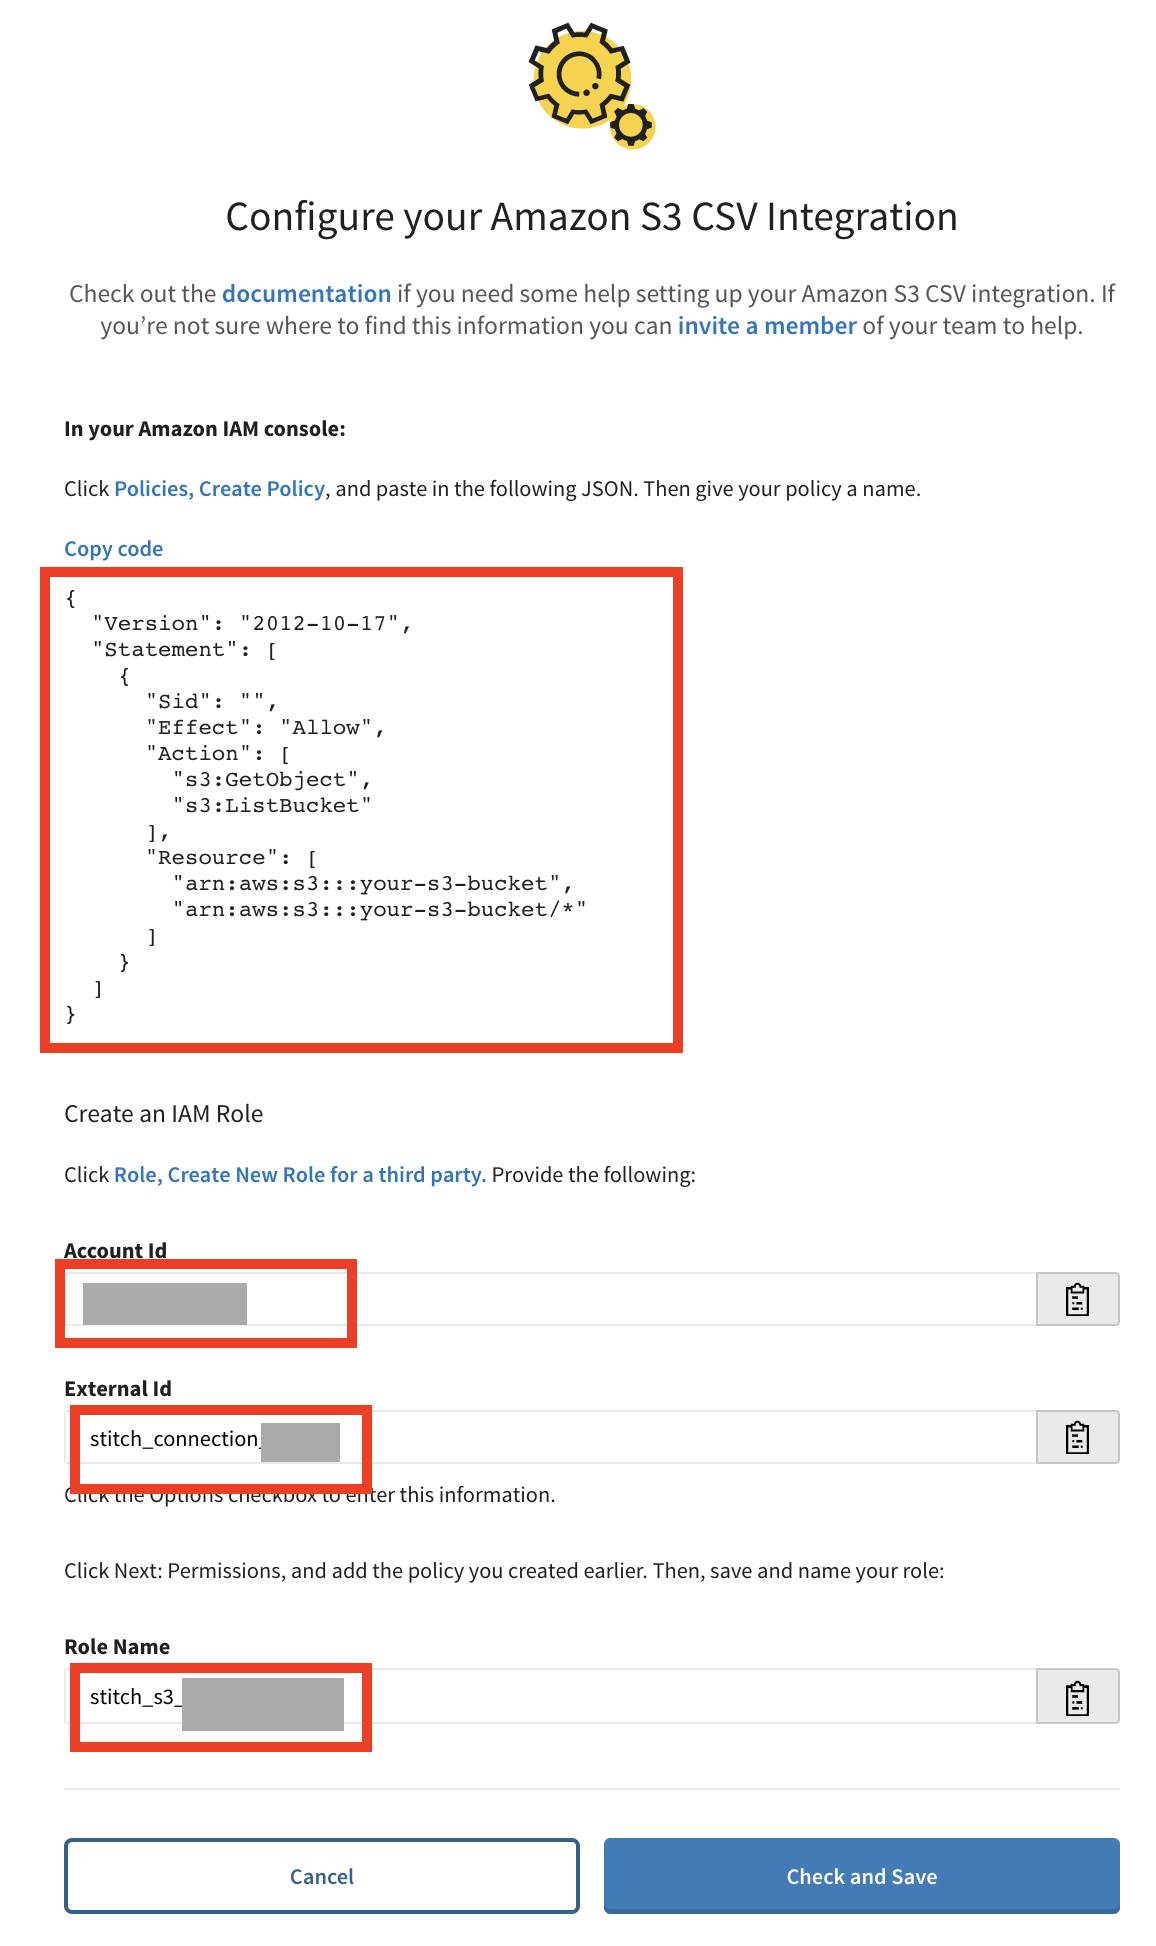
- Log into your AWS account here
- Go to
Services -> IAM, click onPolicieson the left tab and press theCreate Policybutton.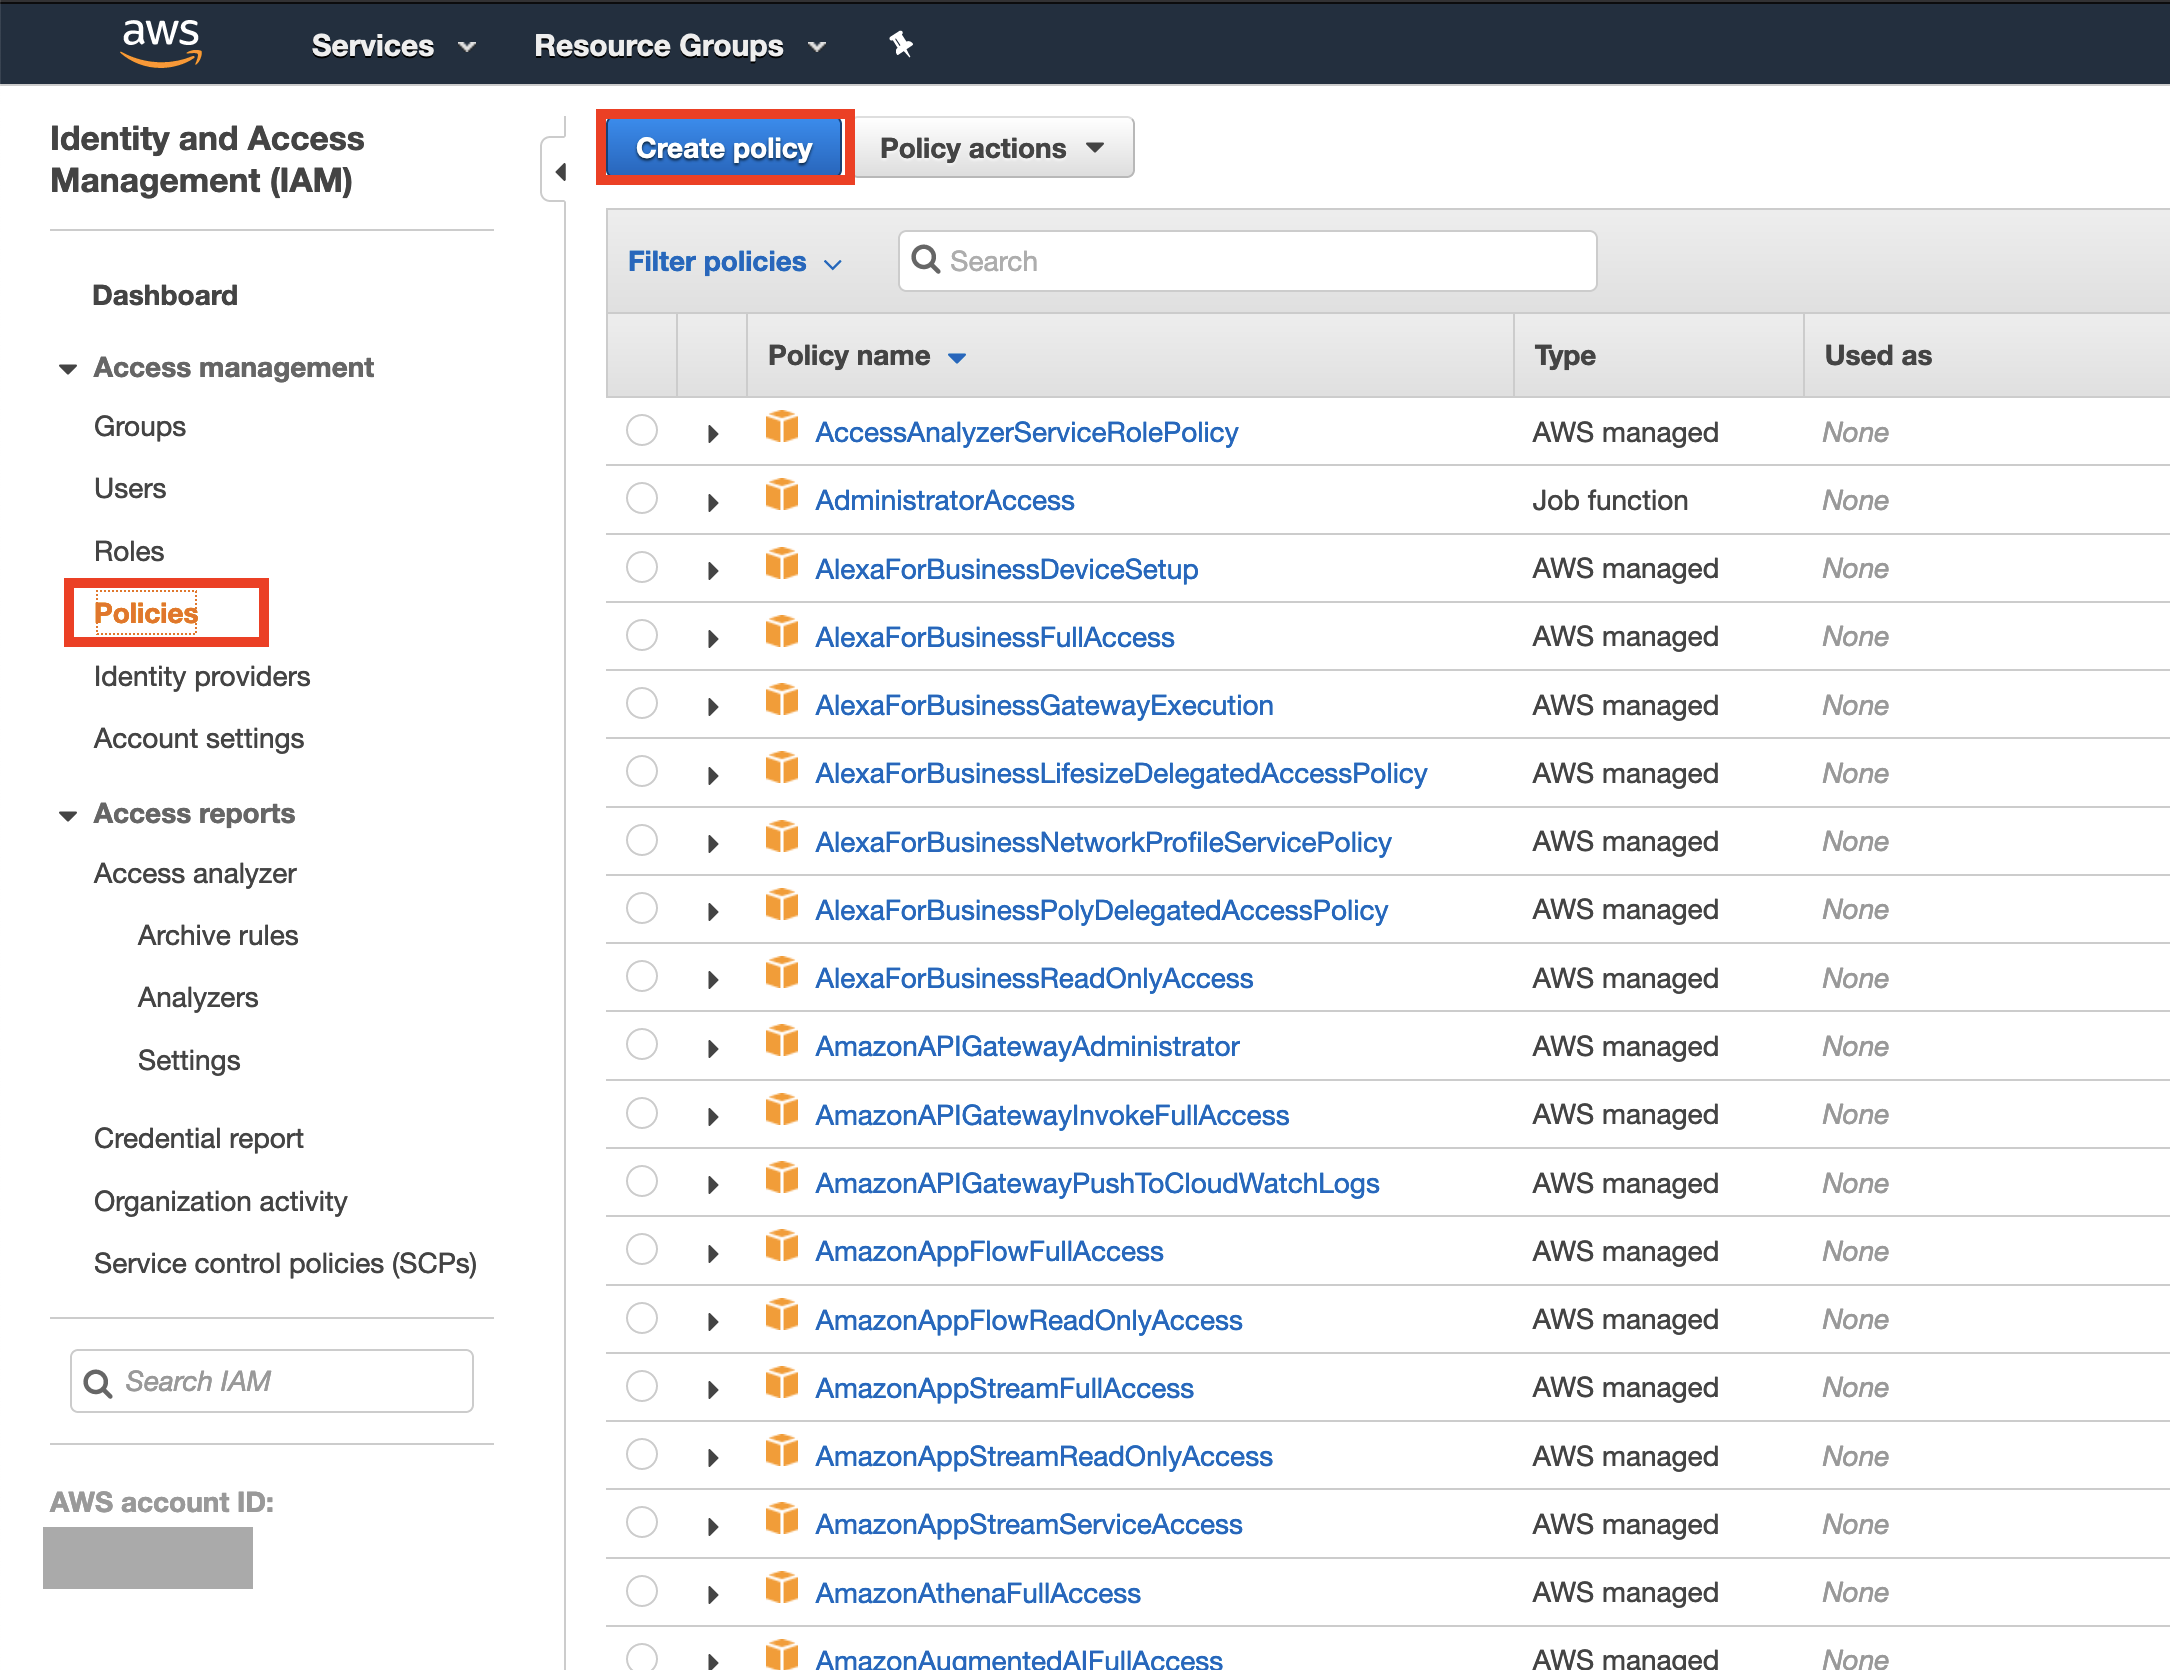
- In the next
Create policypage, choose theJSONtab and paste the JSON from step 9 as shown.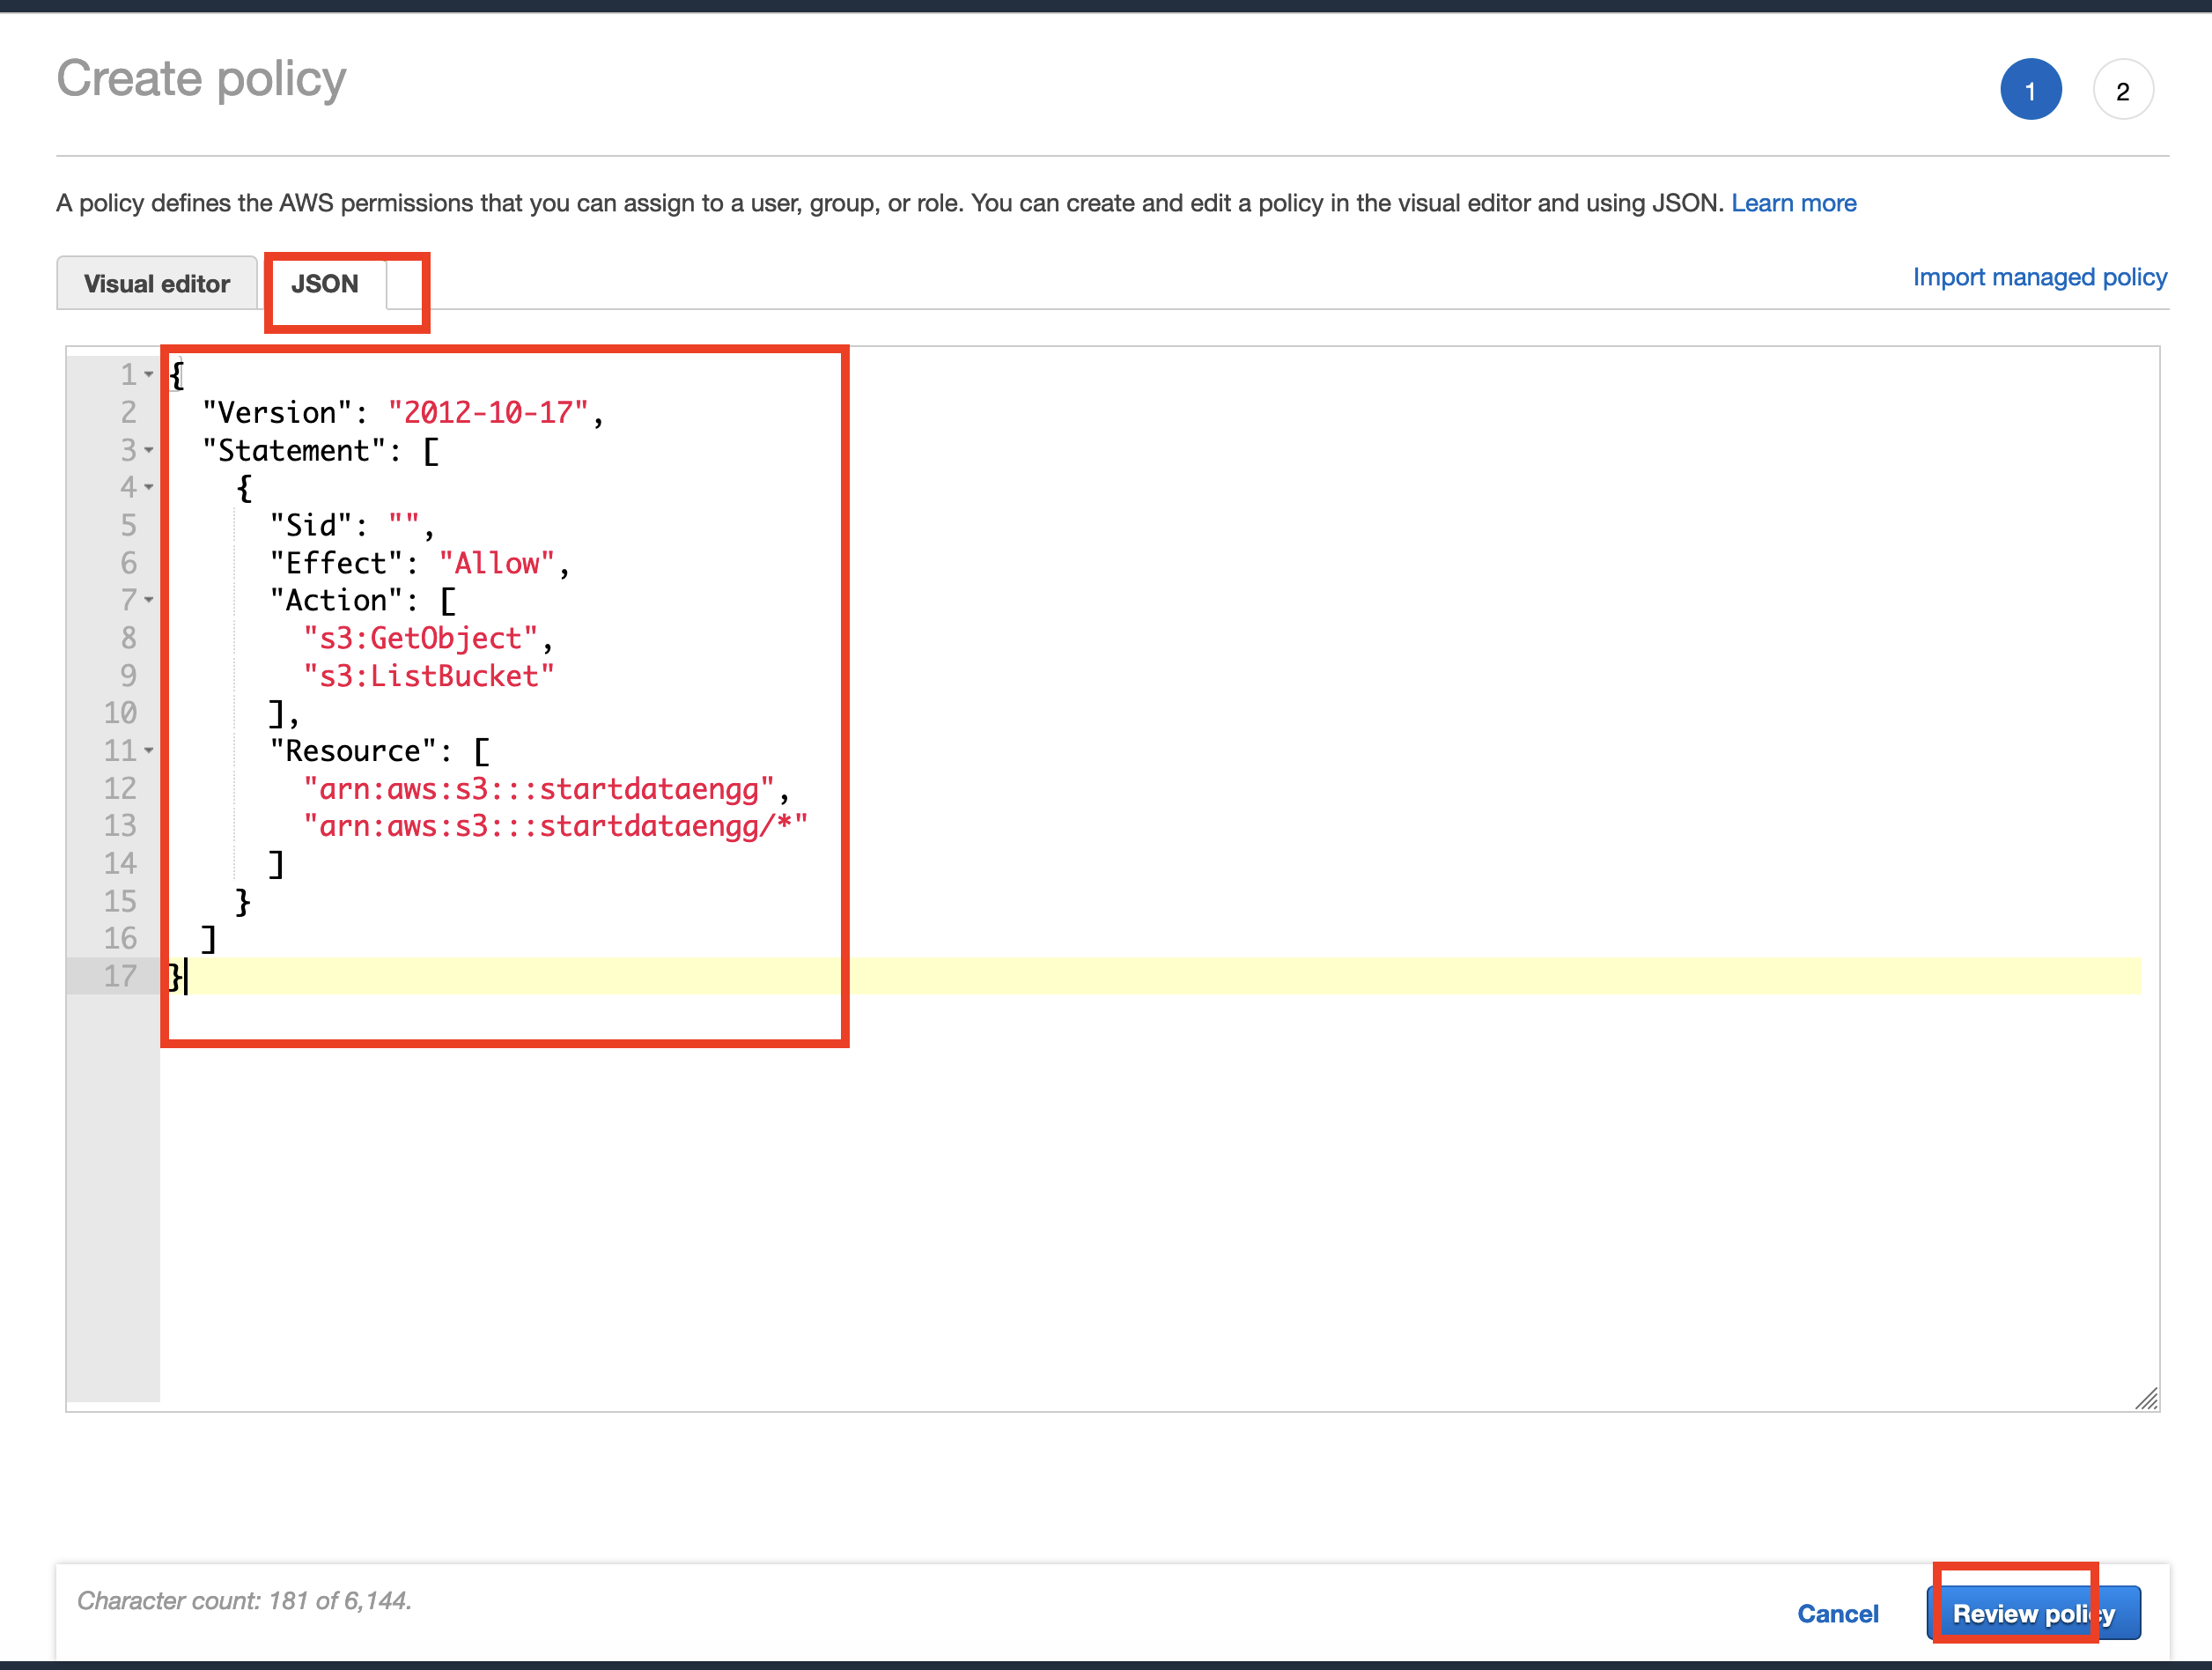
- In the next page, use an appropriate policy name like
stitch_s3_policyand pressCreate Policy.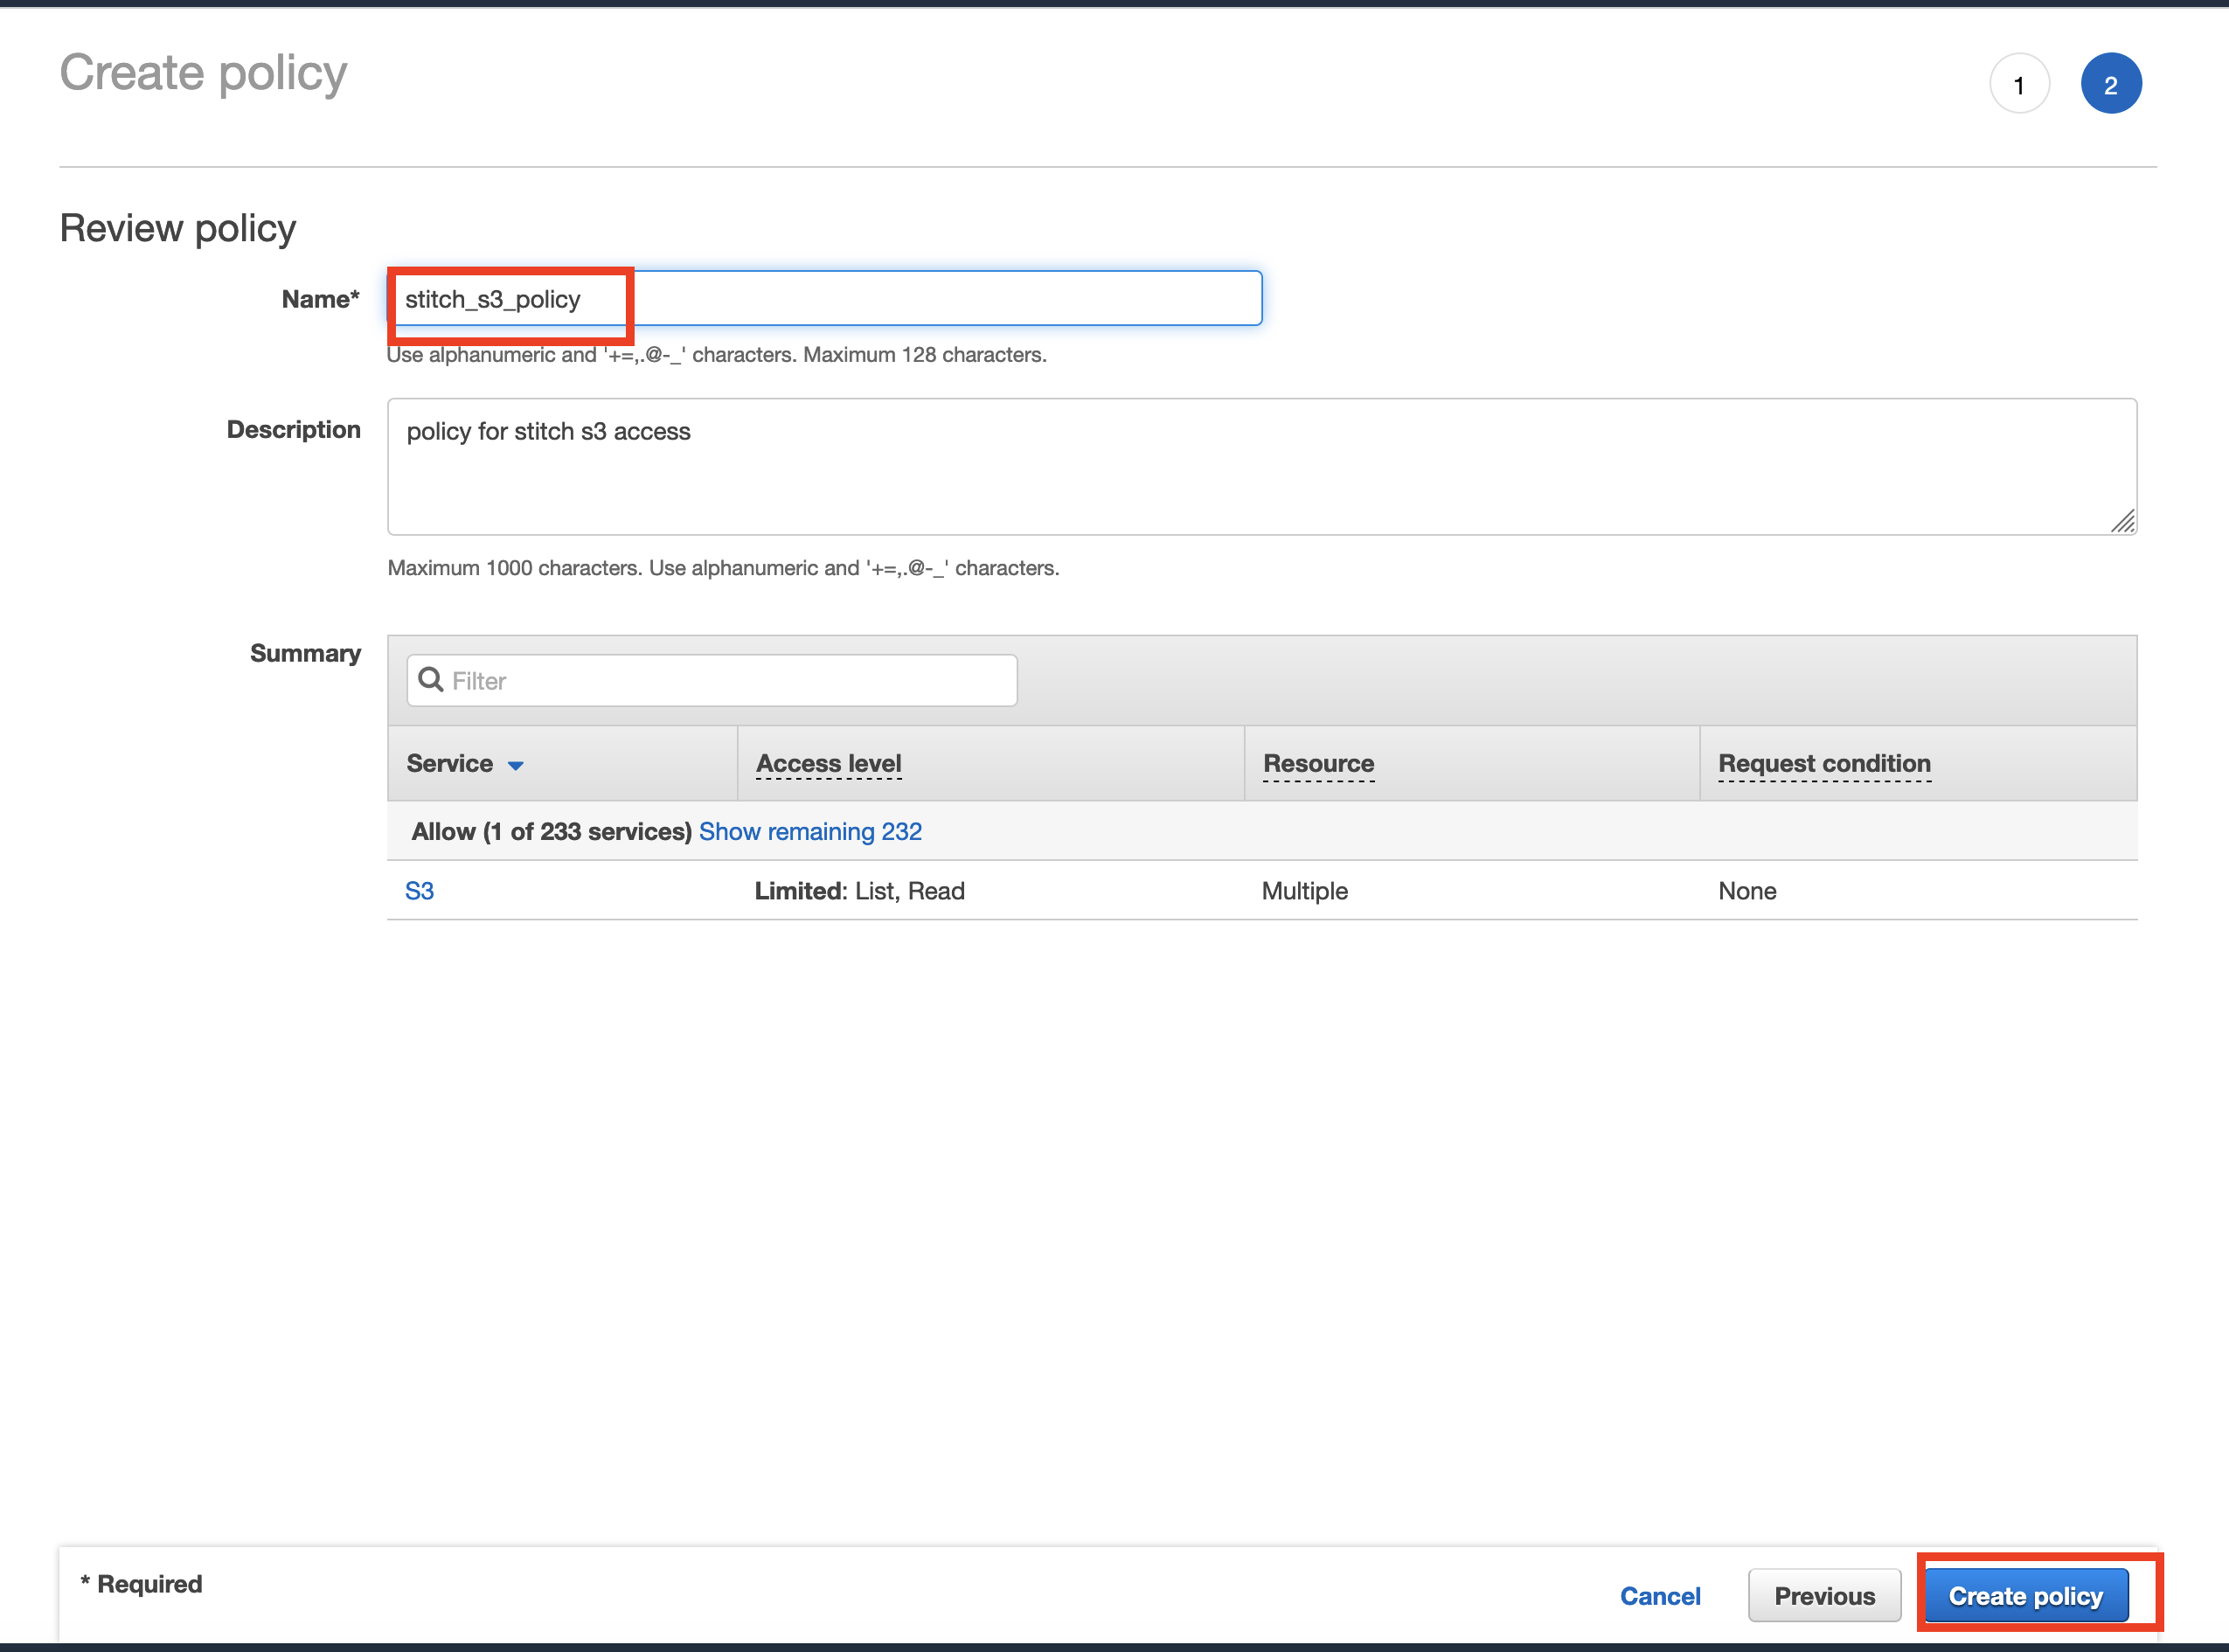
- Now go to
Services -> IAMand choose theRolesoption in the left pane and selectCreate Role.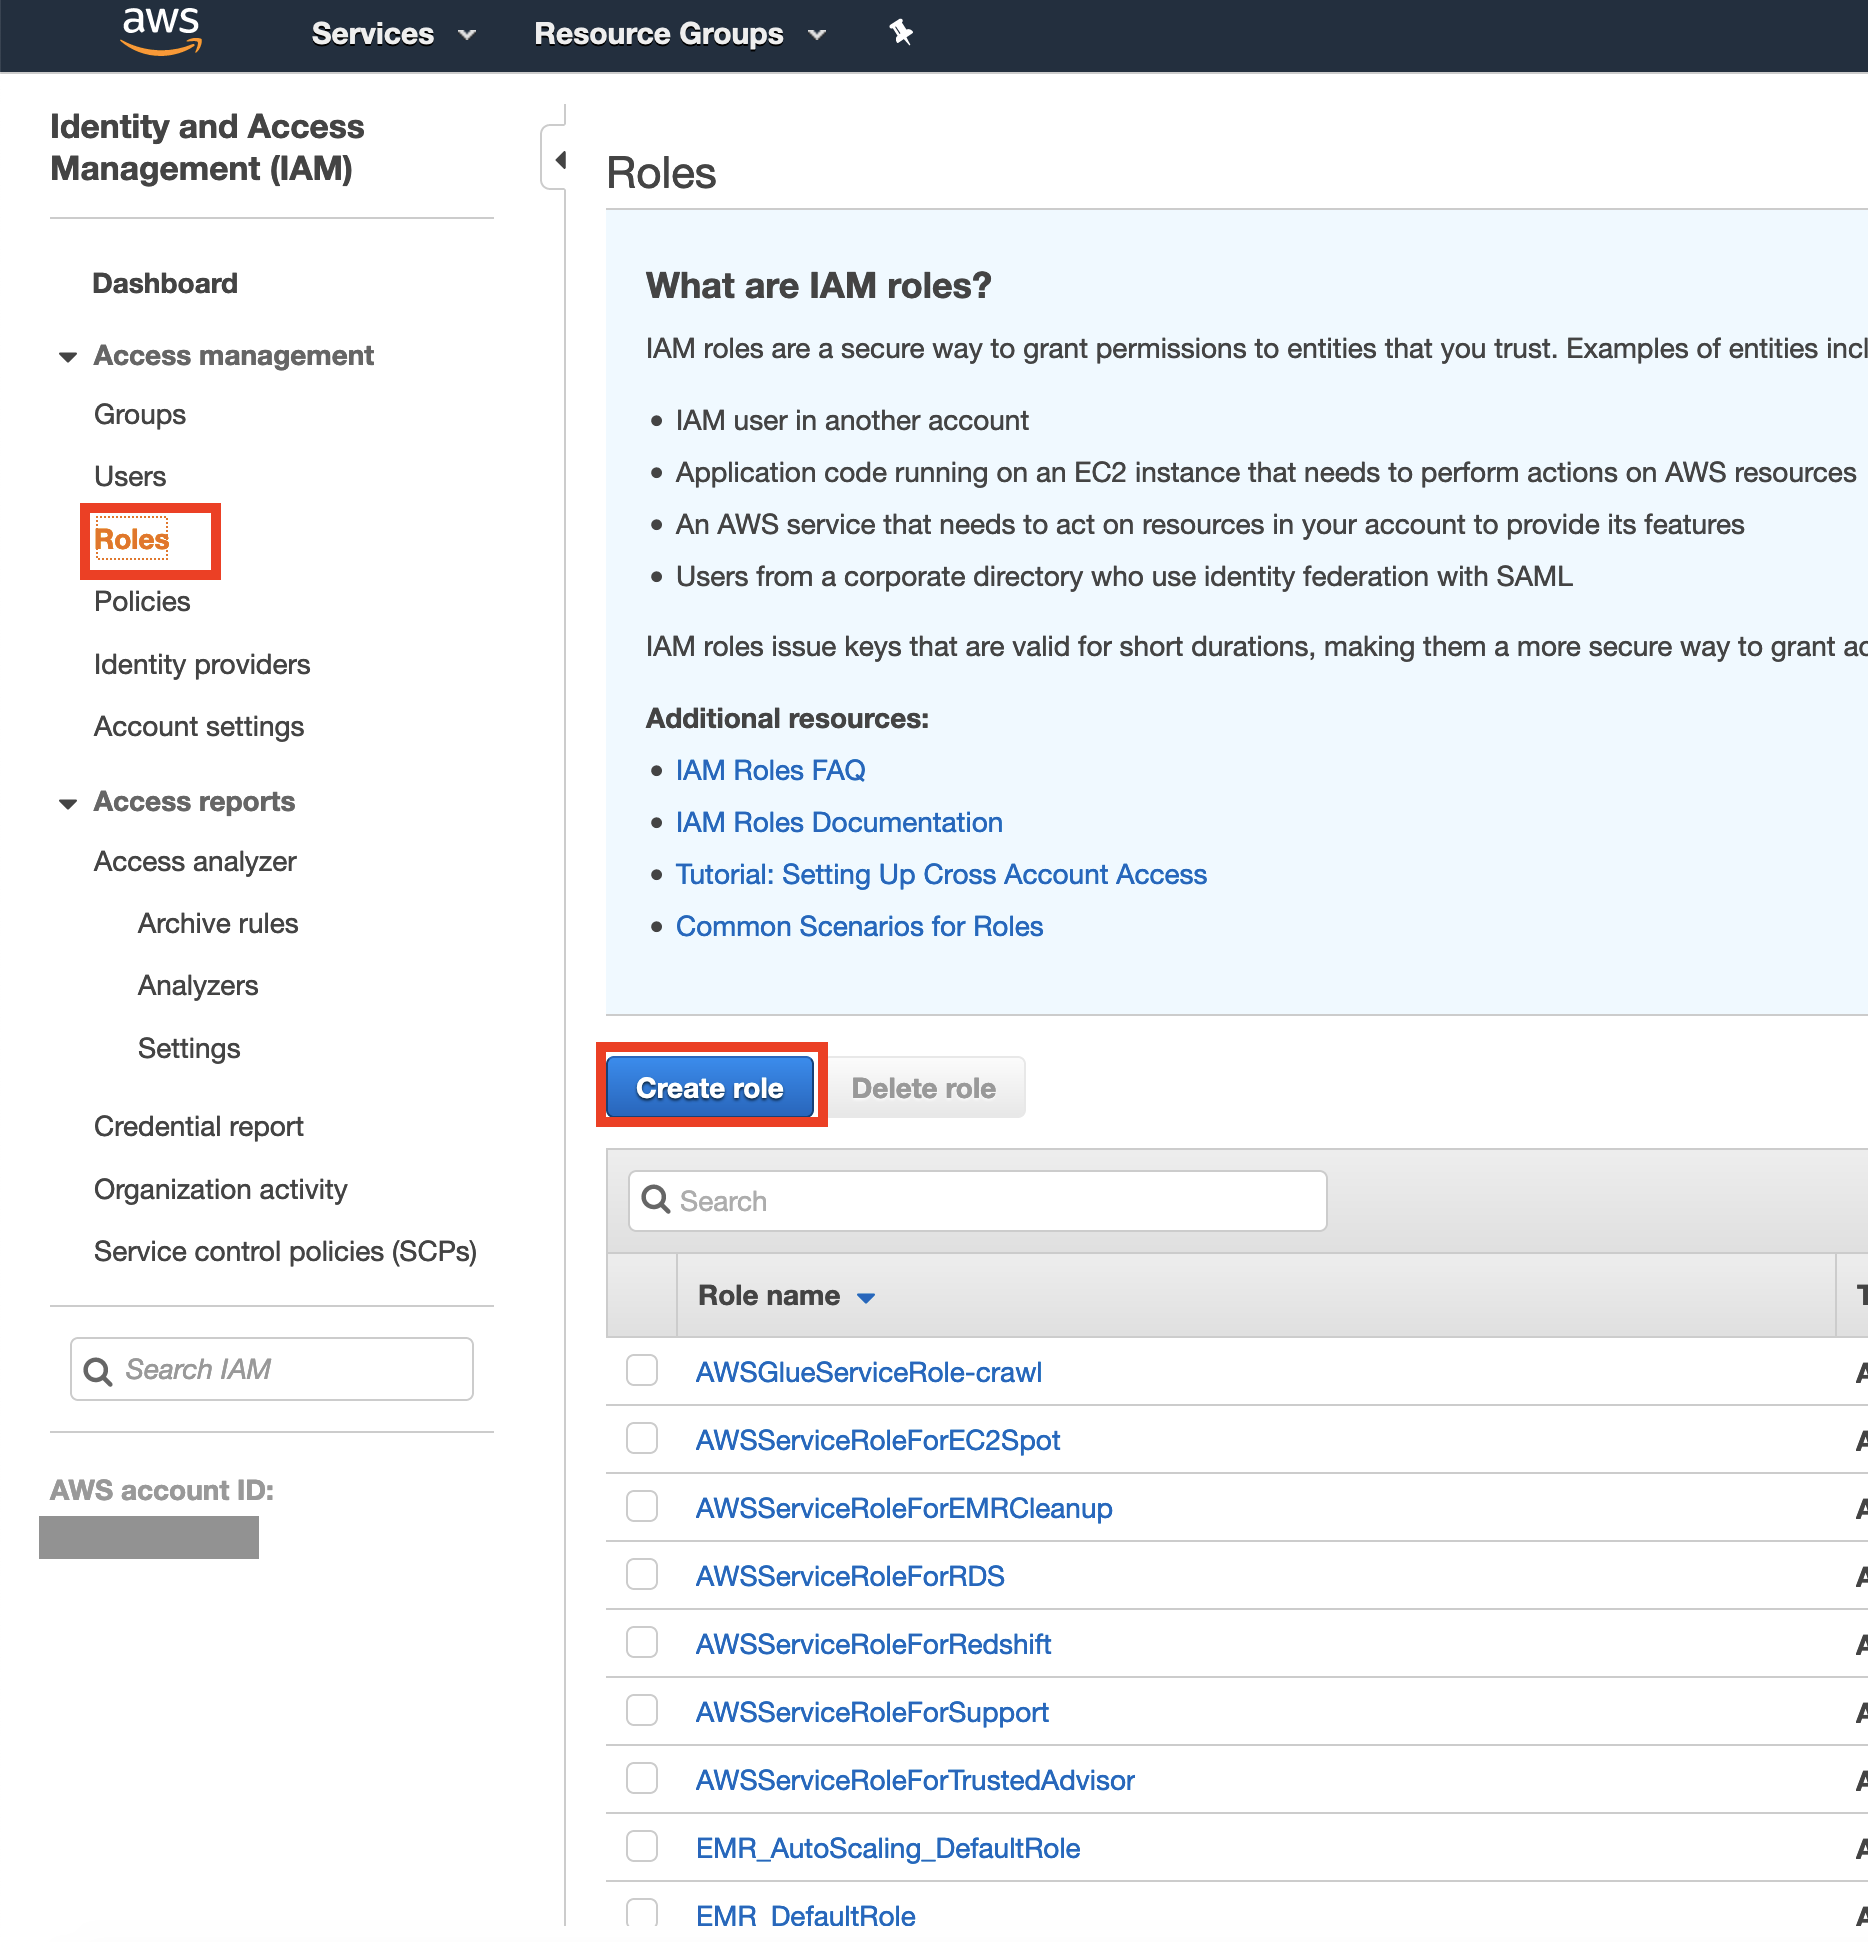
- In the
Create rolepage, chooseAnother AWS accountand use theaccount IDandexternal IDfrom step 9.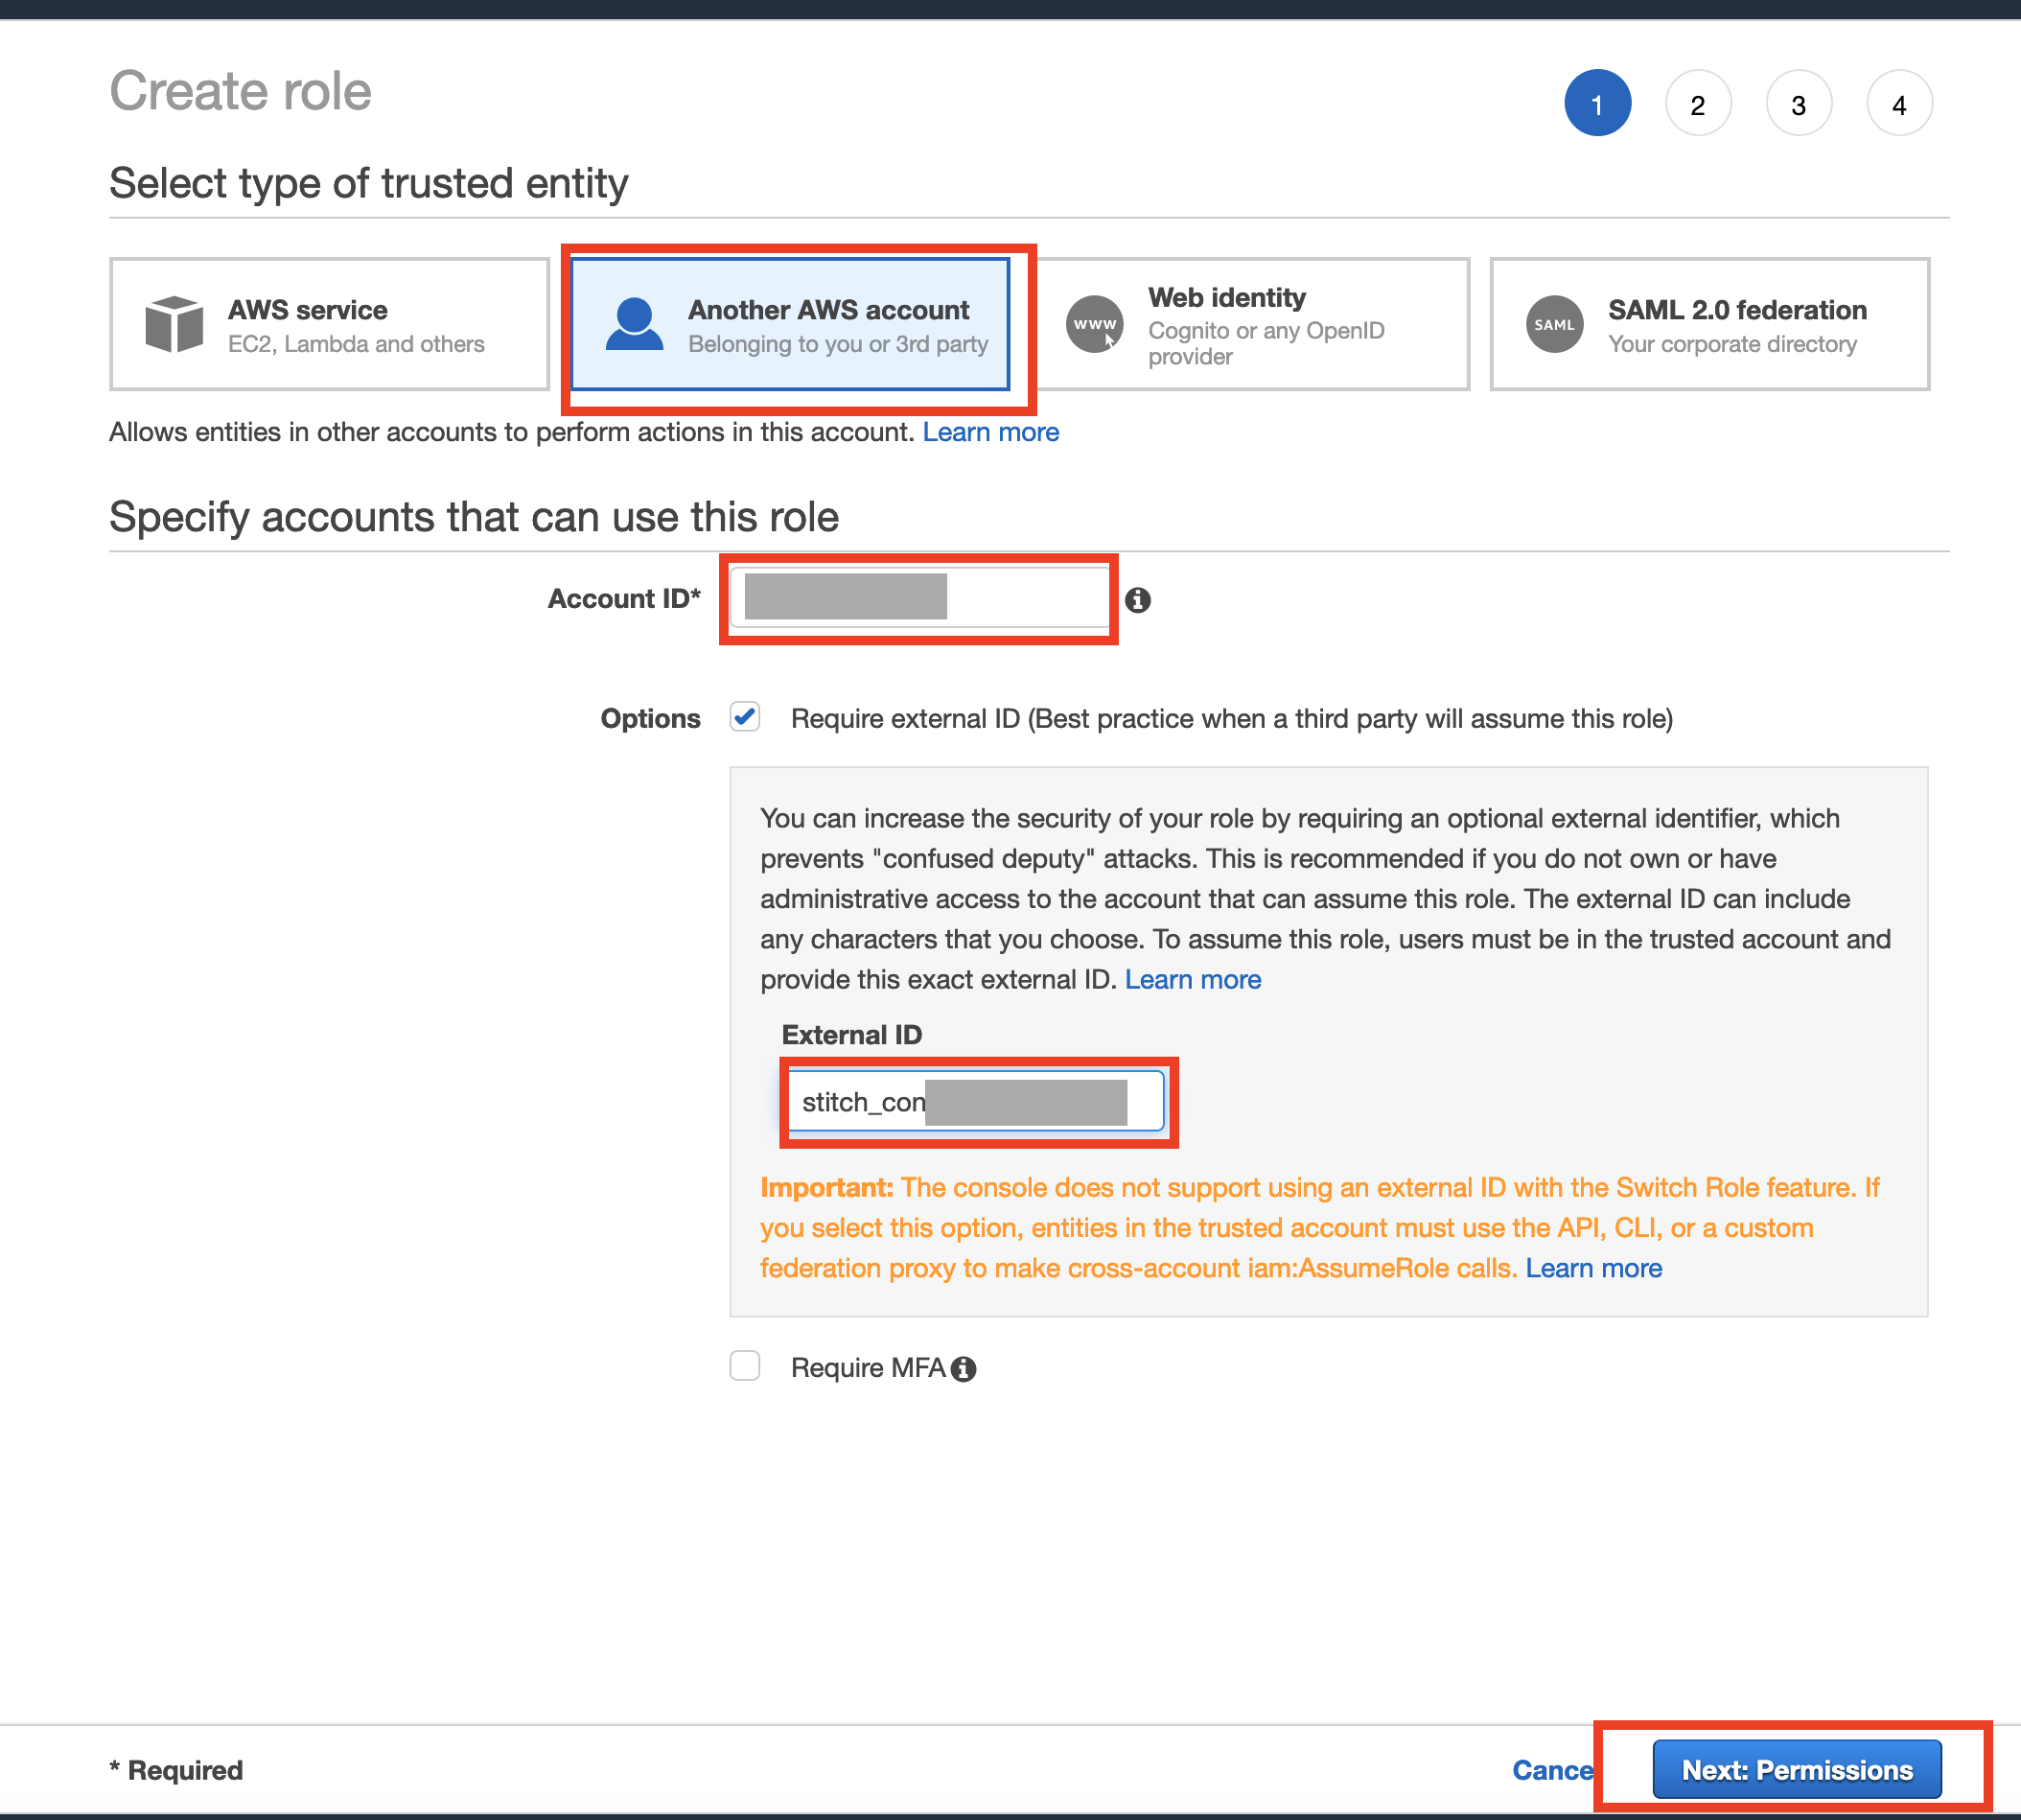
- In the next page add the policy you created earlier in step 13 and press
Next: tags.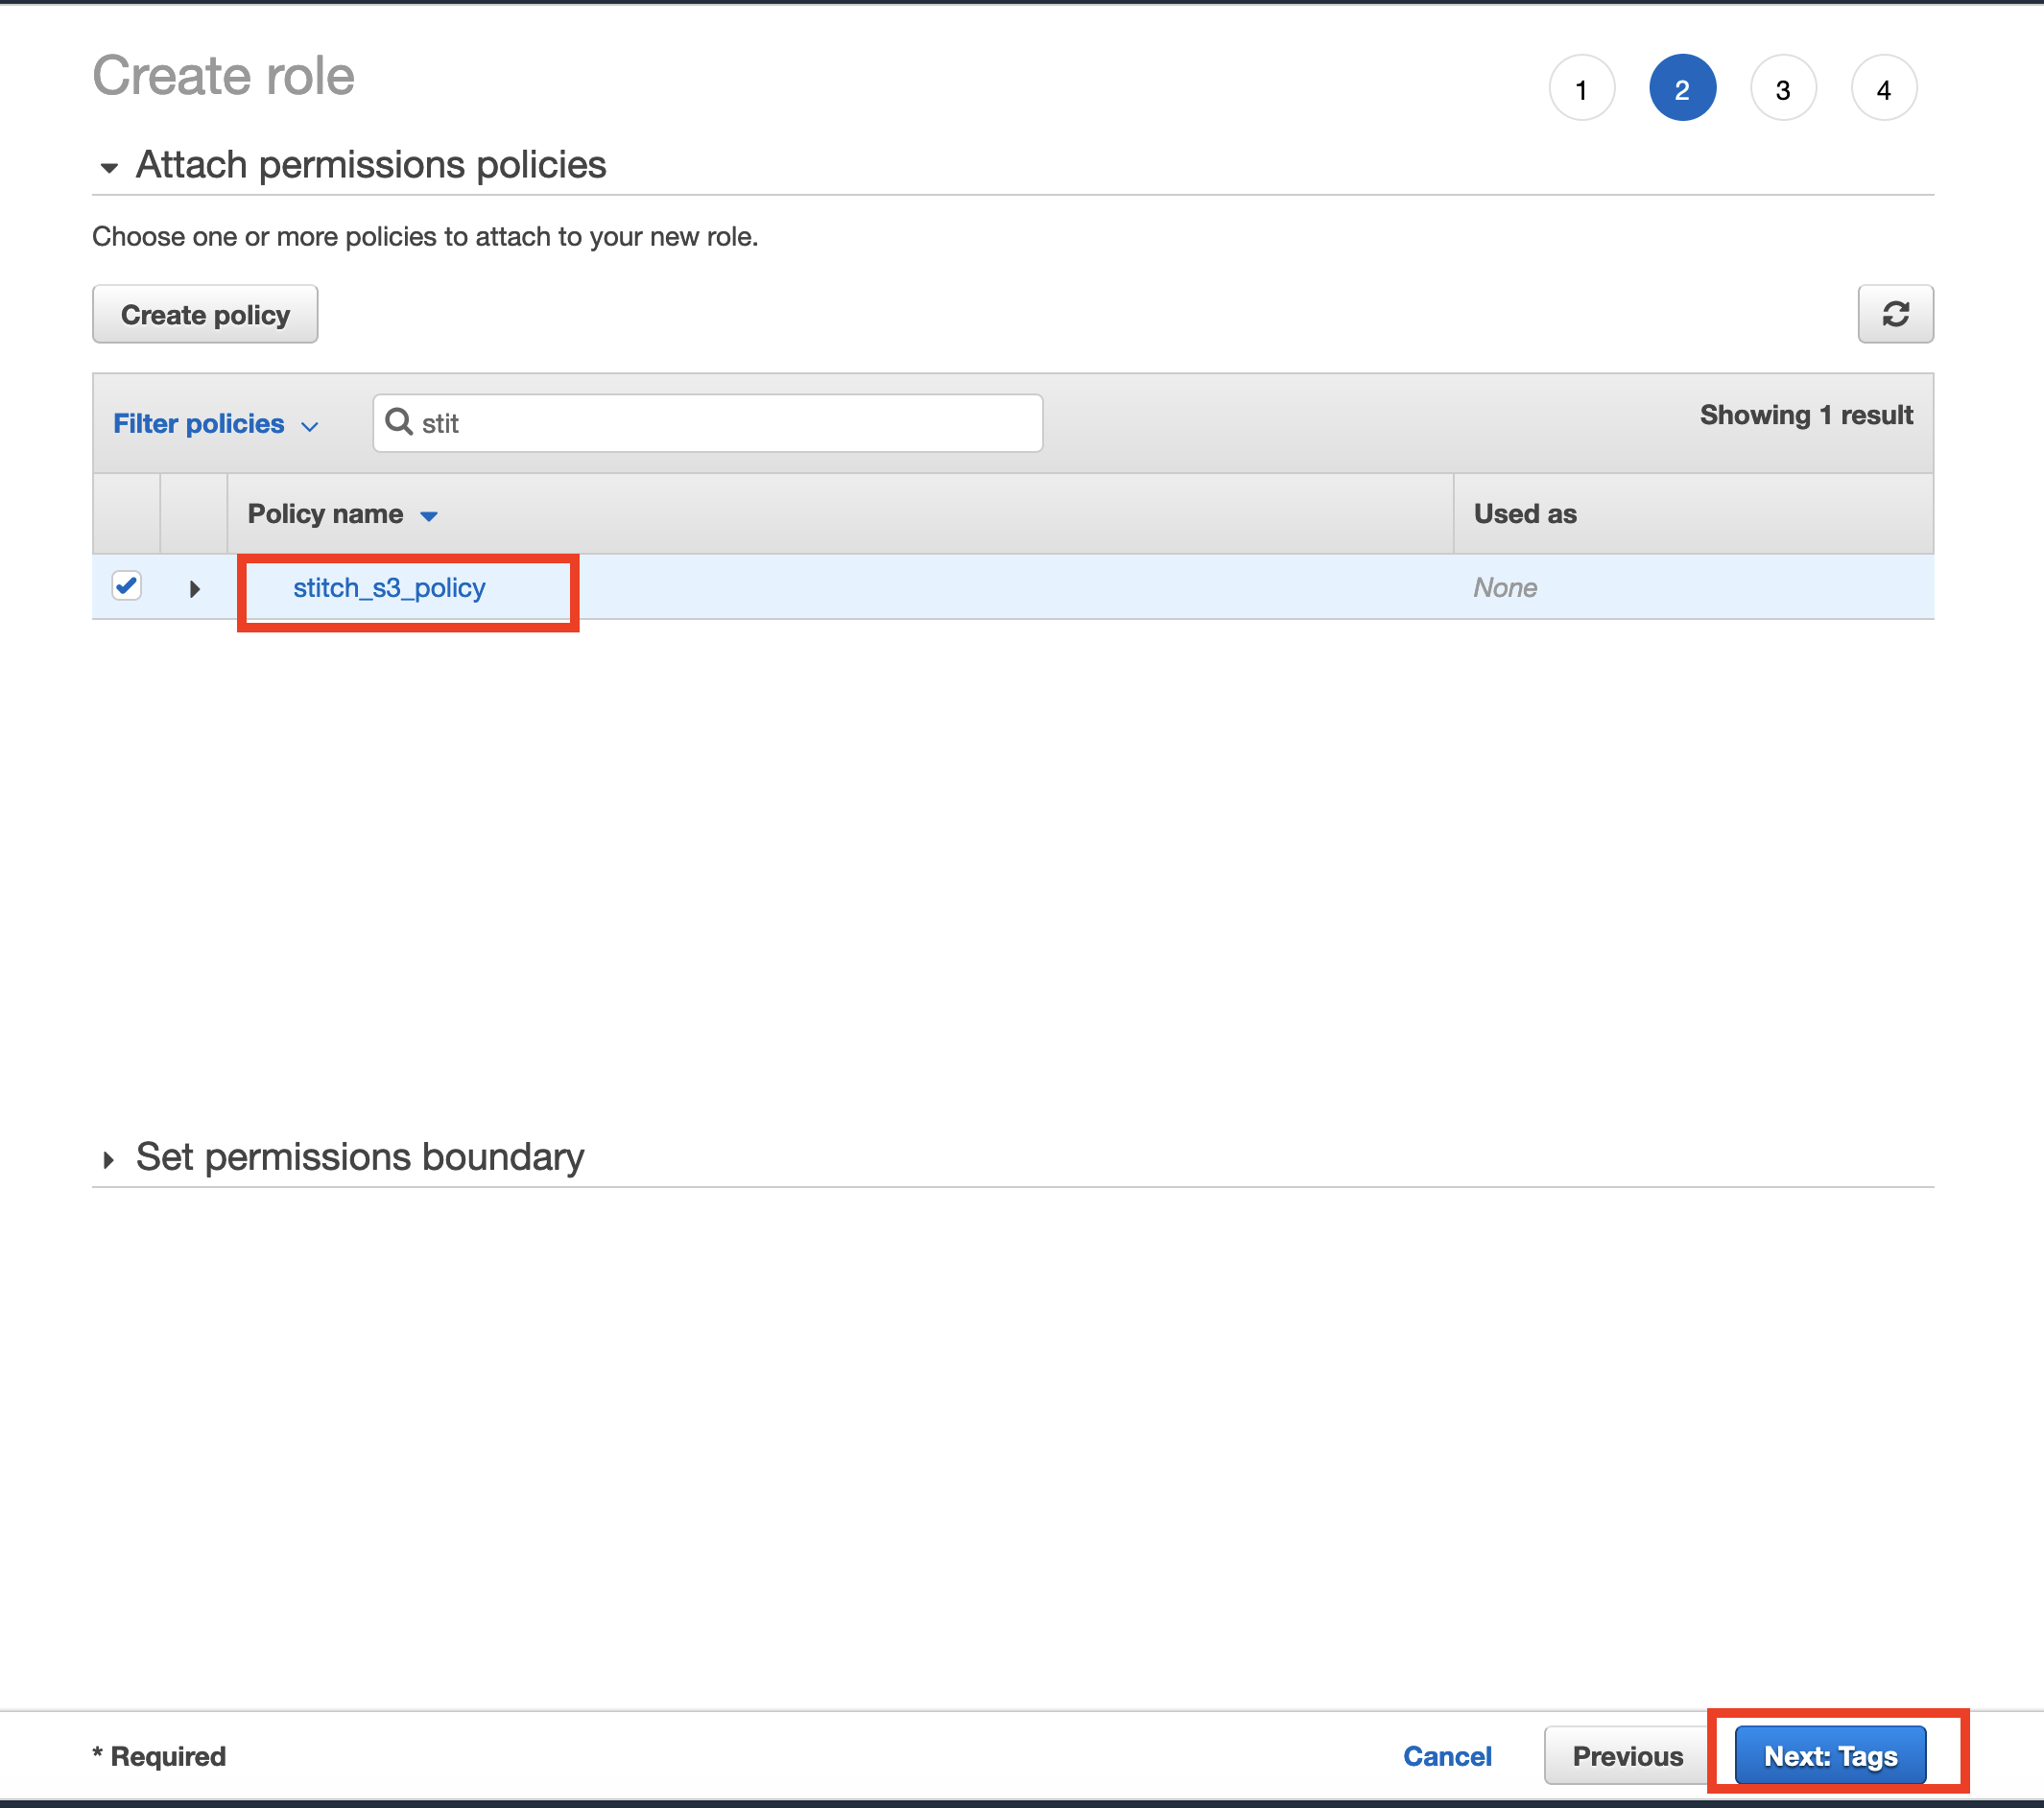
- In the next page, enter the
Role namevalue from step 9 and click oncreate role.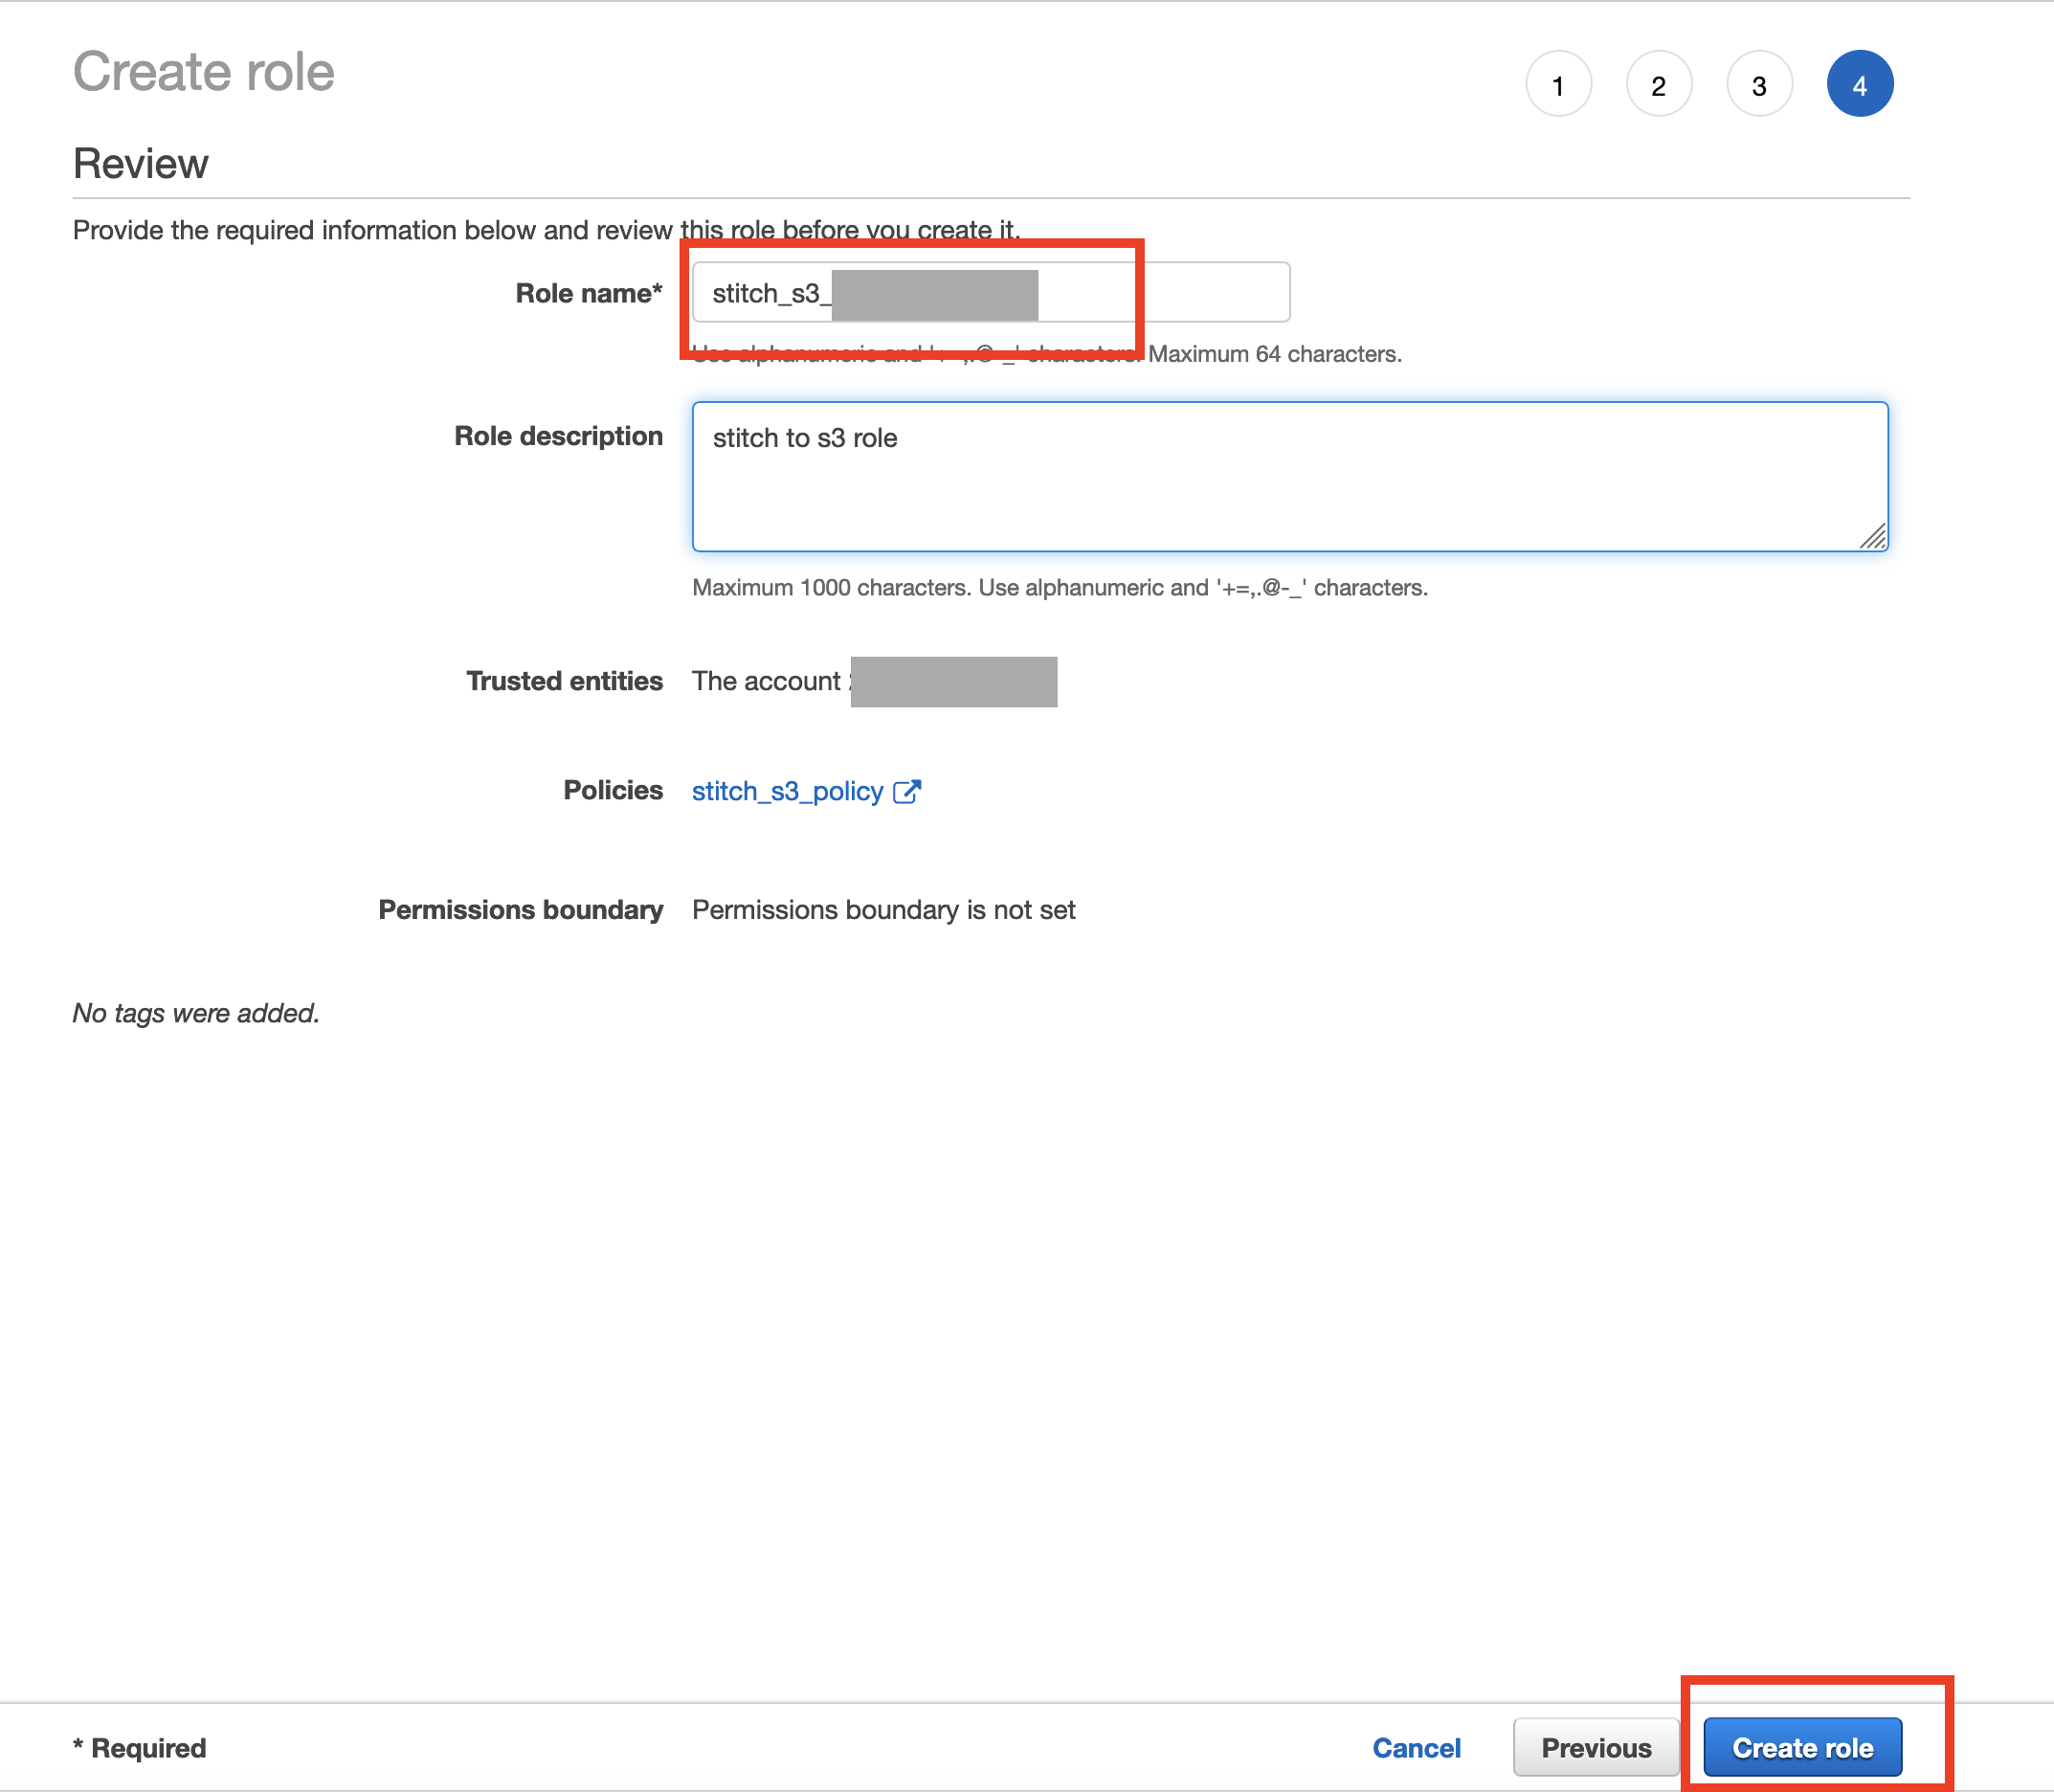
- Now go back to your stitch account and press
check and save.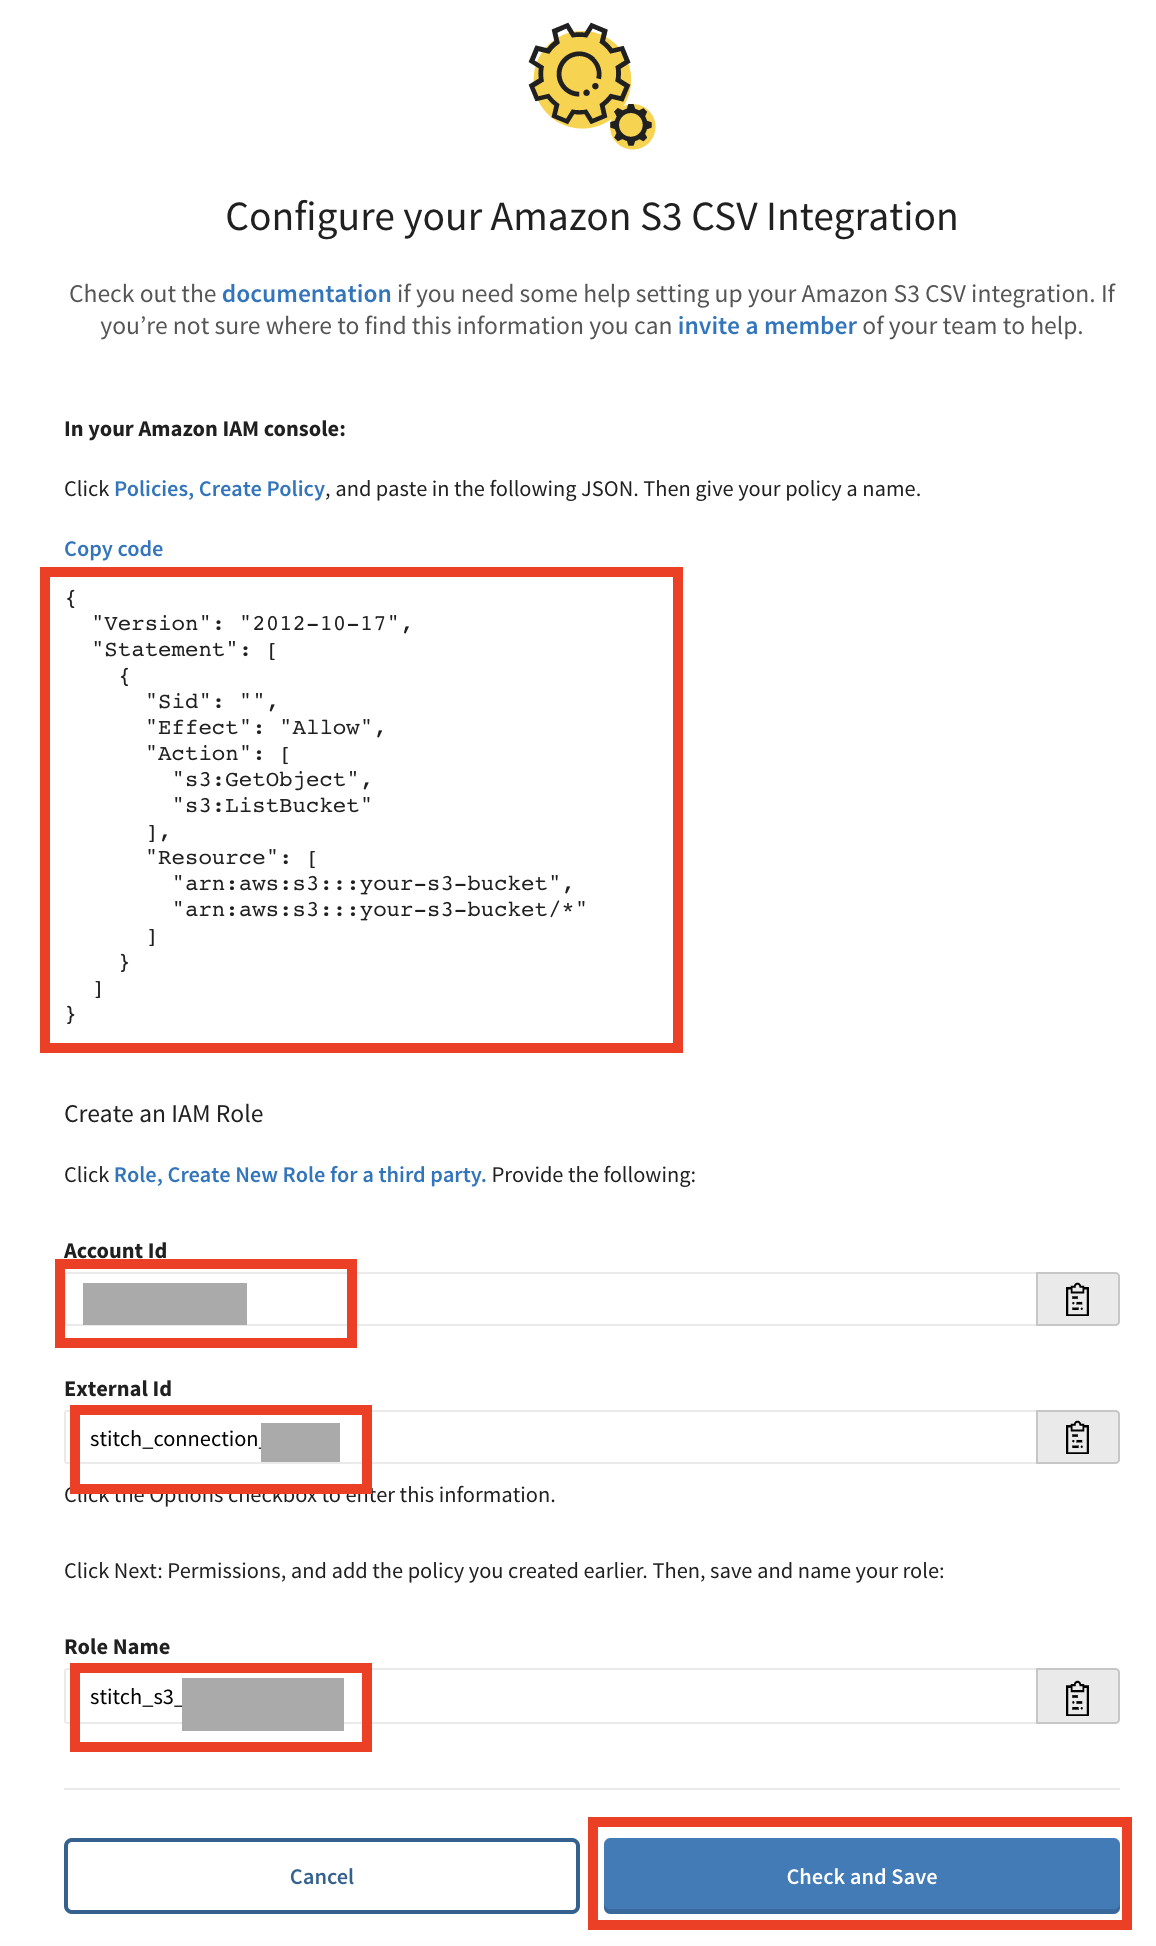
- You will see a
testing connectionpage, wait for this to complete.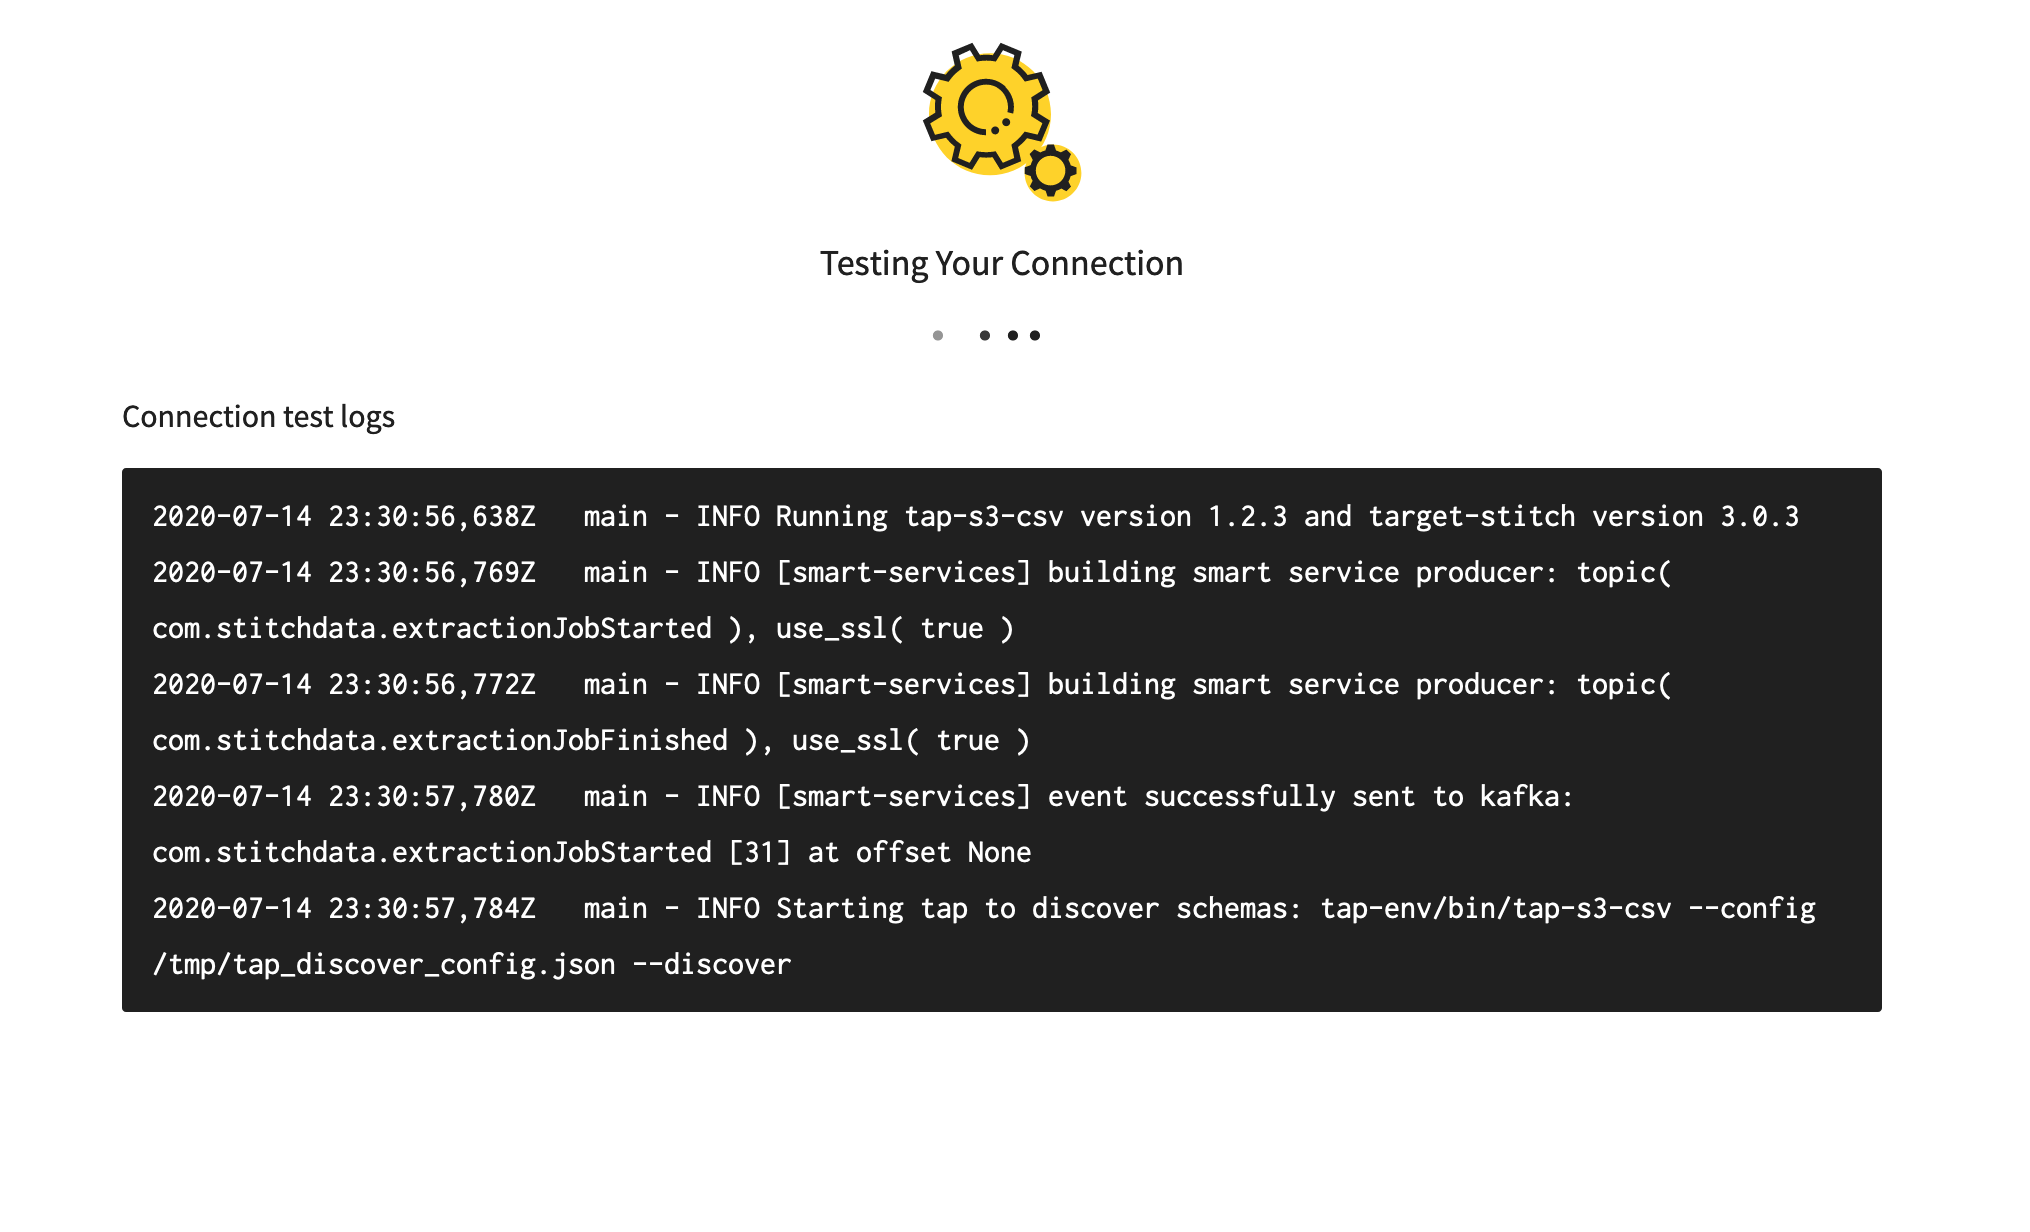
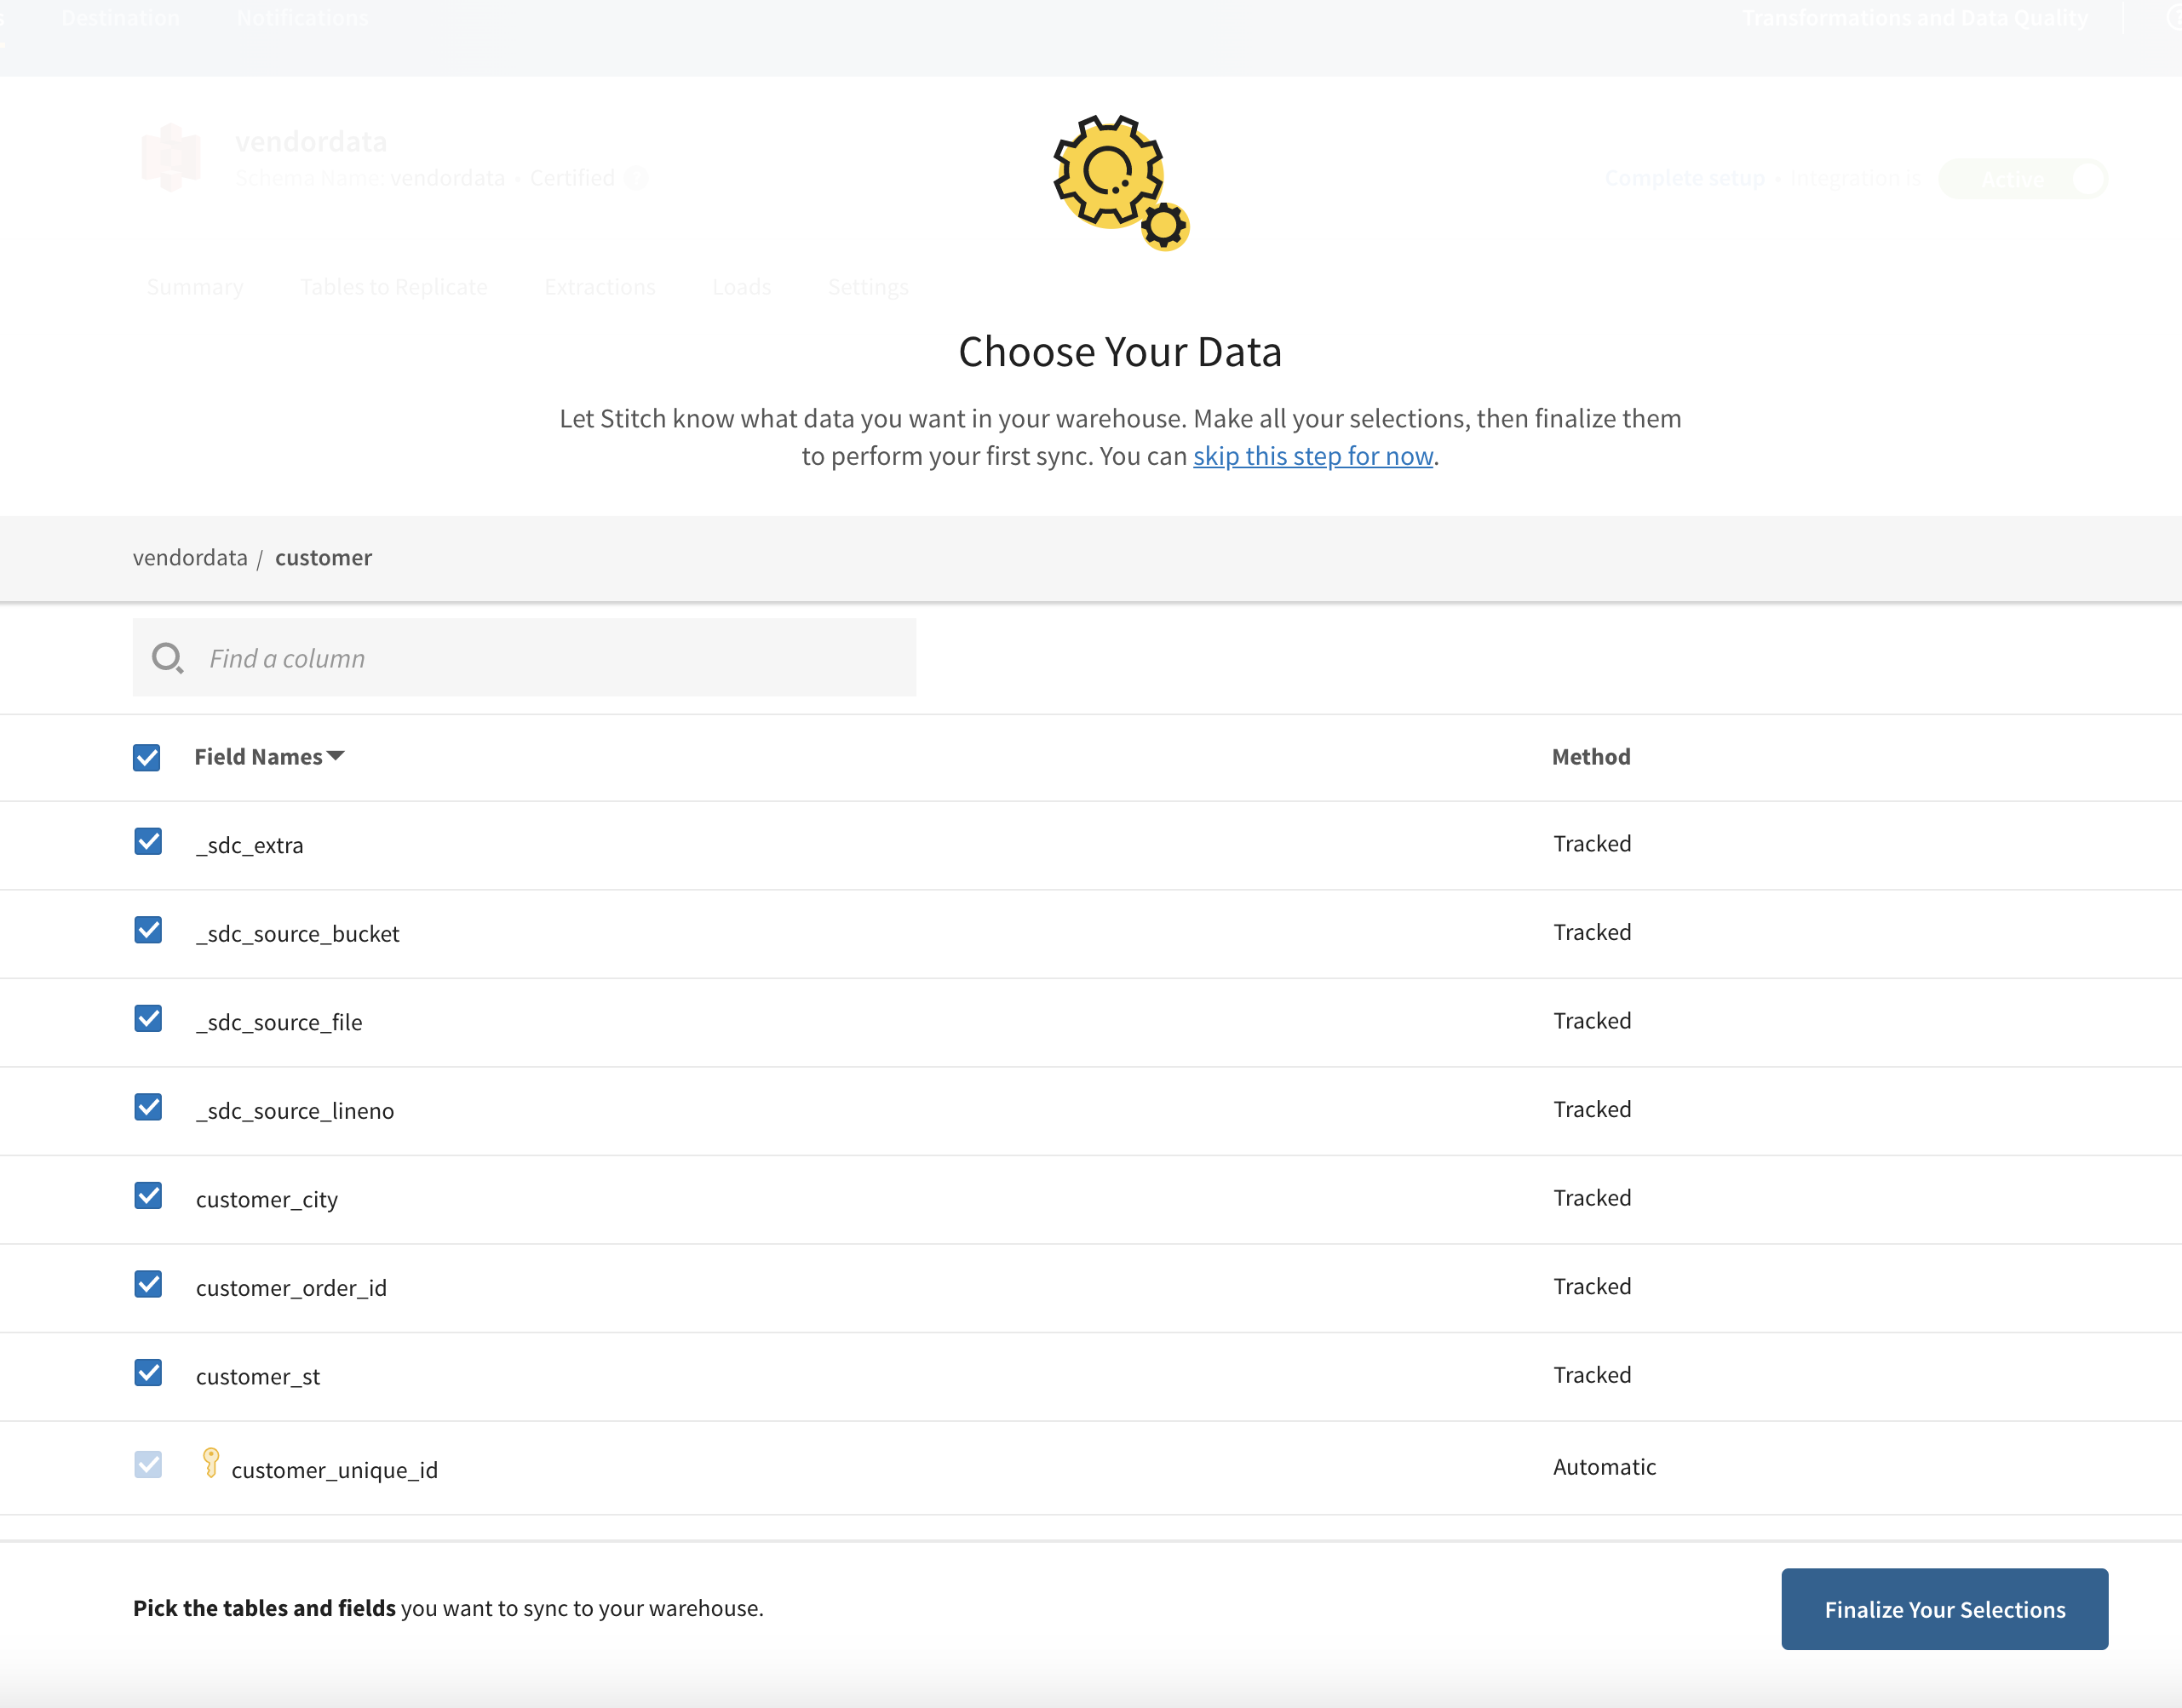
- Then you can choose the table which you want to load the data into, this will be the table name you entered in step 7, make sure to check the table checkbox and after clicking on the table to check all the columns check box.click on
Finalize your selection.