%%{init: {'theme': 'base', 'themeVariables': {'fontSize': '18px'}, 'sequence': {'actorFontSize': 18, 'noteFontSize': 16, 'messageFontSize': 16, 'width': 200, 'height': 50}}}%%
sequenceDiagram
    participant P as Person
    participant LLM as LLM Chat Window
    participant IDE as IDE

    P->>LLM: Create pipeline prompt
    LLM->>P: Code
    Note over P: Checks code, makes changes as needed
    P->>IDE: Copy paste
Feel like you’re falling behind on leveraging agentic AI workflows?
Unsure about being adoption-ready for this new Agentic paradigm?
Then this post is for you.
The good news is that if you understand DE fundamentals, you’re 95% there.
AI tools change; understanding design patterns and business requirements doesn’t.
By the end of this post, you will know how to effectively use AI to streamline pipeline development.
Setup Code at building-data-pipelines-with-ai.
Video walkthrough
NotePost Takeaways
- Define how you’d think about a workflow (e.g., pipeline dev) in skill markdown files.
- Continuously improve skill files with additional information and how to use them.
Coding agent makes LLM code creation simple
Using LLM chat to generate code requires providing sufficient context each time and copy-pasting code between our repo and the chat box (as shown below).
Coding agents are designed to work seamlessly with LLM providers to generate code. With coding agents, we can
- Create reusable skills
- Provide the LLM with an understanding of project structure & code
- Use different models
Coding agents enable seamless integration with an LLM provider.
In this post, we will use the pi coding agent, but the concepts apply to all coding agents. Let’s look at how a coding agent helps with generating code.
%%{init: {'theme': 'base', 'themeVariables': {'fontSize': '18px'}, 'sequence': {'actorFontSize': 18, 'noteFontSize': 16, 'messageFontSize': 16, 'width': 200, 'height': 50}}}%%
sequenceDiagram
    participant P as Person
    participant IDE as IDE with Coding Agent
    participant API as LLM API
    P->>IDE: Create pipeline prompt
    IDE->>API: System & user prompt
    loop until task complete
        API->>IDE: Tool calls (MCP, CLI, etc)
        IDE->>API: Tool results
    end
    API->>IDE: Final code / summary
    IDE->>P: Proposed code / diff
    Note over P: Checks code, makes changes as needed
    P->>IDE: Approves
Define your development process as a markdown file
When you ask an LLM to create a pipeline, it uses its training data to generate it for you.
However, the code it generates is typically
- Does not follow your team standards
- Verbose and creates unnecessary code
We can solve this using custom skills.
A skill is a Markdown file explaining your team’s approach to a process. A skill file has headers (name, description, etc) and a description of what you want it to do.
Let’s look at our design-pipeline skill:
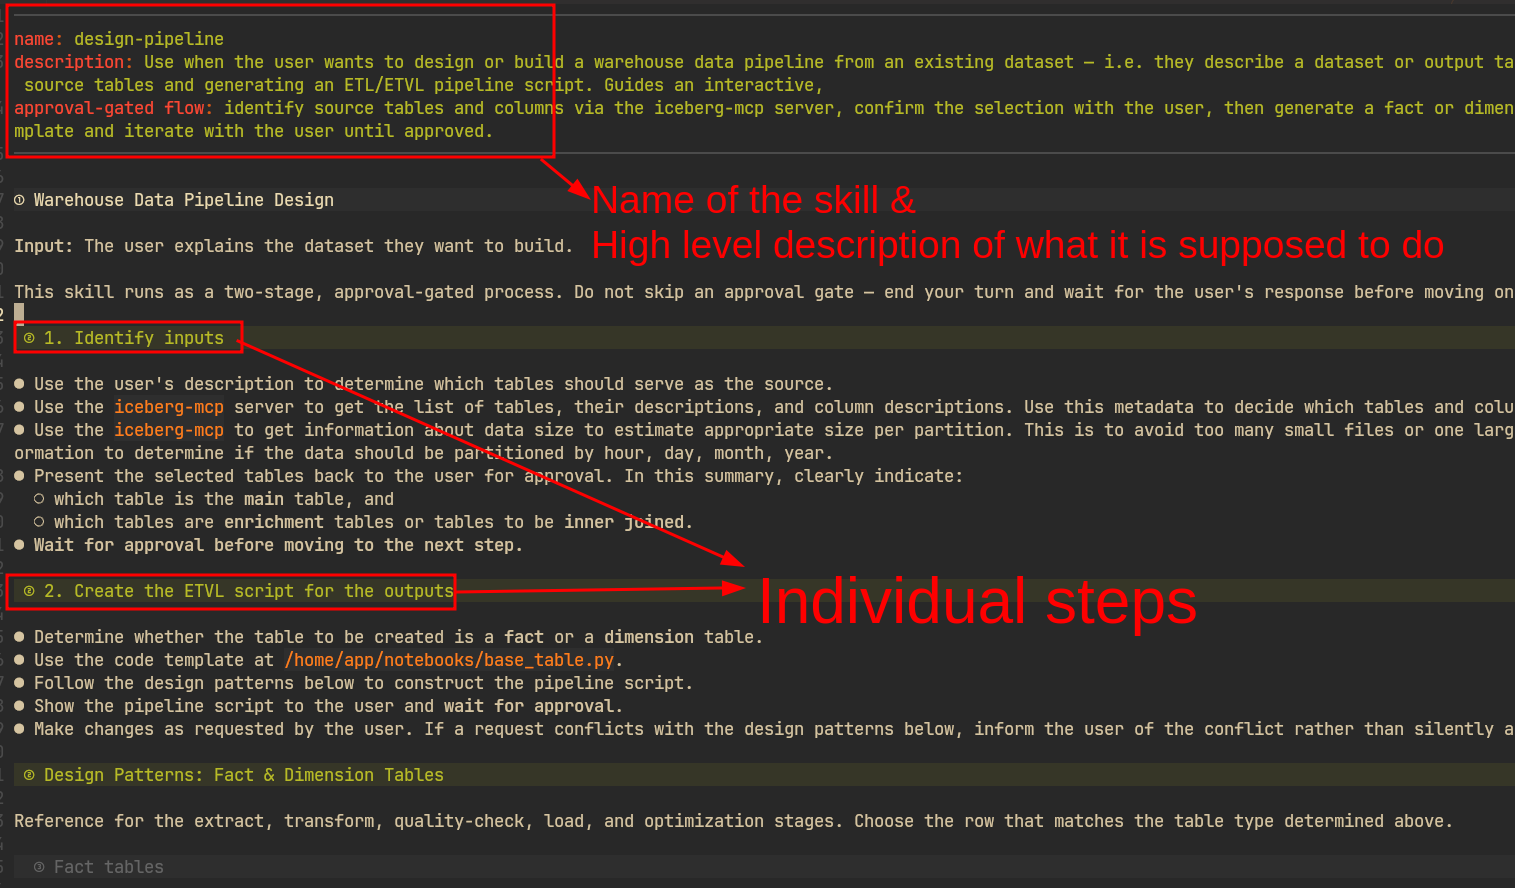
The design part is based on this designing fact and dimension tables post.
Read more about how to create your own skills here: Agent Skills Documentation
The pi agent looks for skill files under the .pi folder. We can tell our coding agent to use this skill with a slash command.
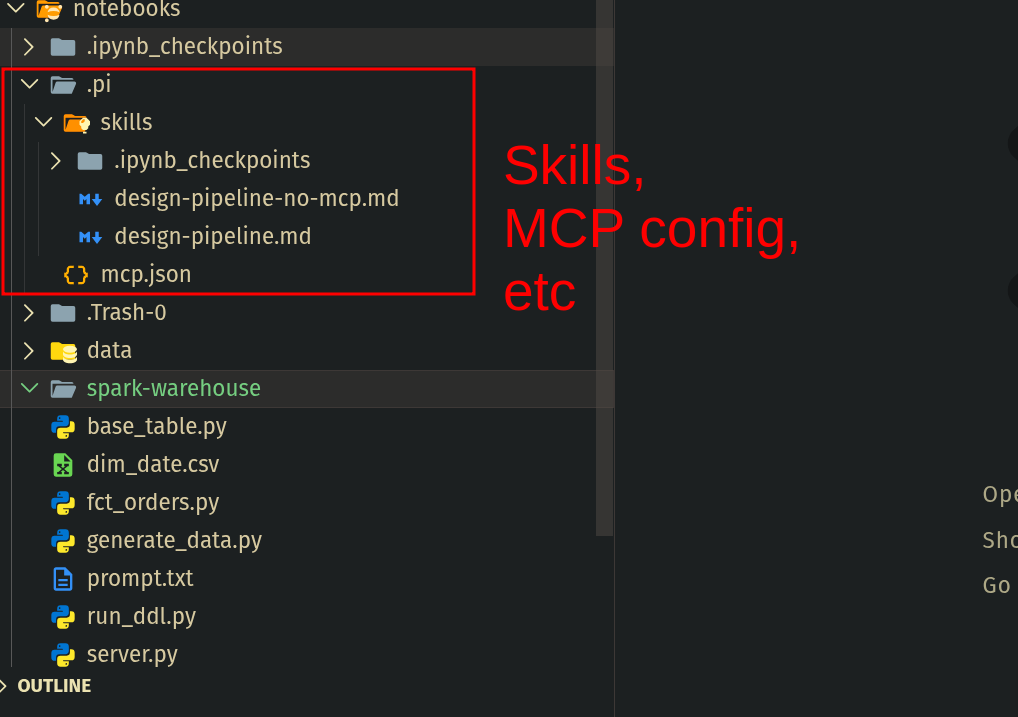
Let’s see how to use this skill.
Video walkthrough
While you can use skills available online, it’s better to modify them for your repo design.
Use tools to get current information about data & code
Data and code are constantly evolving. We can use tools (MCP, CLI, API, etc) to get current information about our data.
When developing a pipeline, a human would understand the input data, its partition, what columns to use, etc. We can enable LLMs to do (approx) the same with tools.
In our case, let’s create a simple Iceberg MCP that provides LLMs the ability to understand data to determine which tables to use as inputs and which columns of those they need to use
%%{init: {'theme': 'base', 'themeVariables': {'fontSize': '18px'}, 'sequence': {'actorFontSize': 18, 'noteFontSize': 16, 'messageFontSize': 16, 'width': 200, 'height': 50}}}%%
sequenceDiagram
    participant Agent as Coding Agent
    participant MCP as MCP Server/CLI/Tools
    participant API as LLM API
    Agent->>MCP: What tools do you expose?
    MCP->>Agent: List of available tools
    Agent->>API: User + system prompt + tool list
    Loop until task complete
        API->>Agent: Call tool x
        Agent->>MCP: Execute x
        MCP->>Agent: Result of x
        Agent->>API: Result of x
    end
    API->>Agent: Final code + summary
Here is the structure of our MCP server.
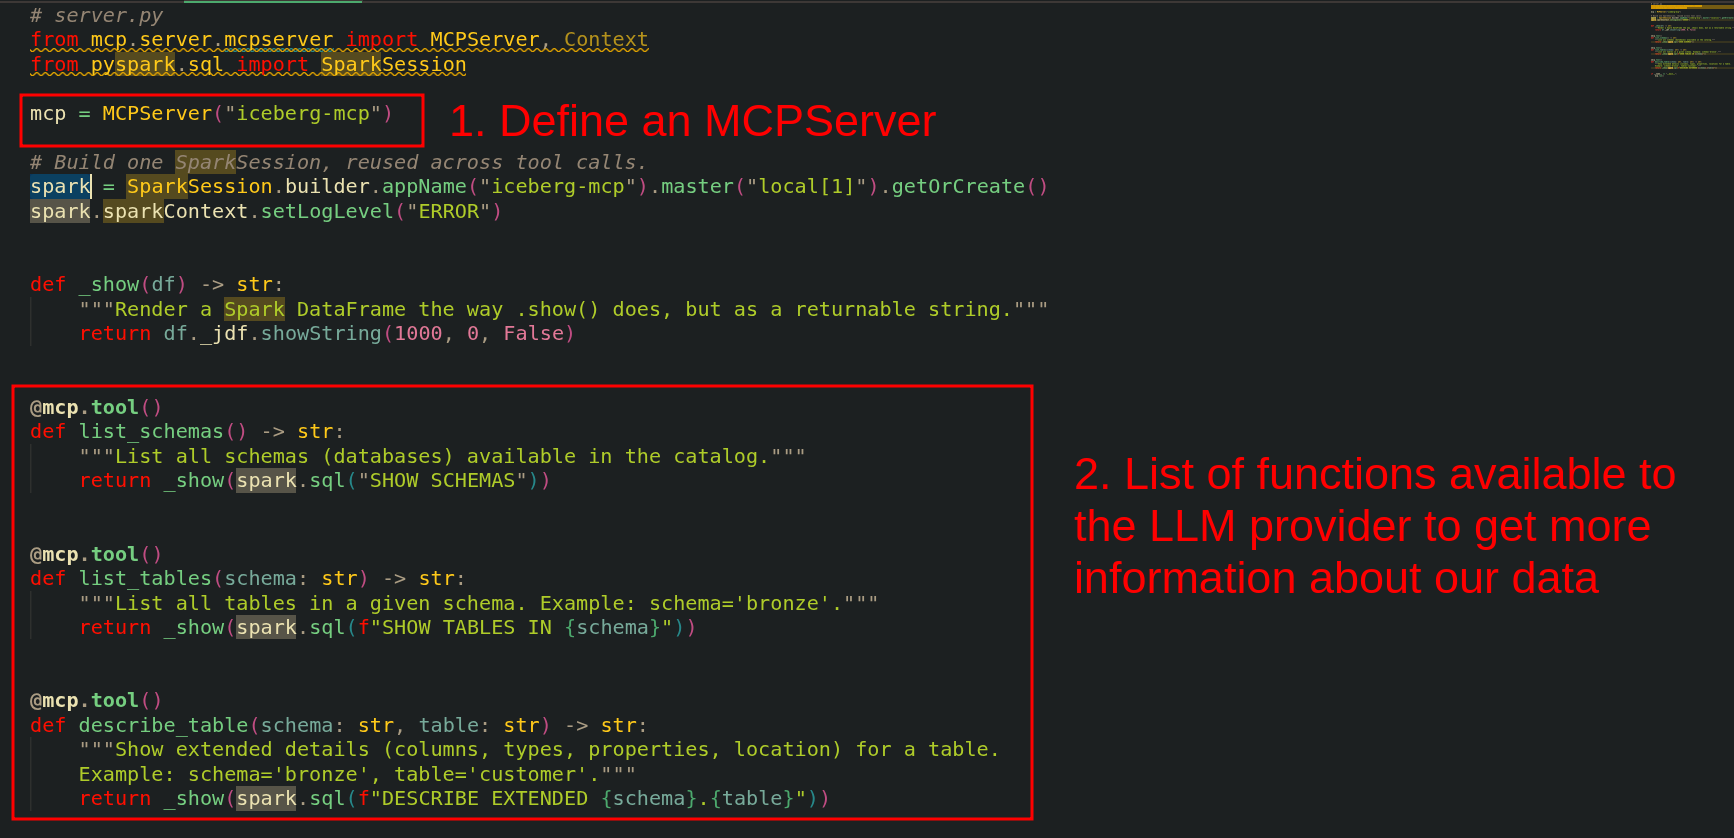
Let’s look at the skill that tells the LLM how to use this MCP.
- Use the `iceberg-mcp` server to get the list of tables, their descriptions, and column descriptions. Use this metadata to decide which tables and columns are relevant to the request.
- Use the `iceberg-mcp` to get information about data size to estimate an appropriate size per partition. This is to avoid too many small files or one large file per partition. Use this information to determine if the data should be partitioned by hour, day, month, or year.
This is something we would have done manually; with a tool, we can now enable LLMs to make the right decision.
A tool can be anything: an MCP, CLI, API call, etc as long as you are able to get the information you need.
In our example, we use Iceberg-mcp to get information.
Video walkthrough
Conclusion
To recap, we saw
- How coding agents make LLM-assisted code development easy
- Skill files are your workflows, defined as a markdown file
- Providing additional information results in higher-quality code
Post Takeaways
How do you use LLMs for data engineering? Let me know in the comments below.